Using Cloudflare Workers to Solve Docker Image Pull Issues
Due to certain reasons, Docker images cannot be pulled normally in China. The method I wrote last year for accelerating image pulls is also no longer functional. Where there’s a will, there’s a way (not really). So I’ve written a new tutorial to solve the Docker image pull issue using Cloudflare Workers.
This article uses Cloudflare Workers to solve the problem of being unable to pull images. I won’t go into too much detail about Cloudflare here, and Cloudflare Workers is also a free service. If you’re not familiar with it, you can check out previous articles like “cloudflare加快github下载”. If you don’t want to follow this guide, you can reply with “jsdc” in the background to get the public service address I’ve set up.
Prerequisites:
-
A domain name. If you don’t want to purchase a domain, you can use a free second-level domain. I also wrote an article about this before: “免费申请注册eu.org二级域名”.
-
A Cloudflare (hereinafter referred to as CF) account.
1. Add Domain NS Server
For CF basics and adding NS resolution, please refer to “利用cloudflare让ipv4与ipv6互通”. I won’t repeat it here.
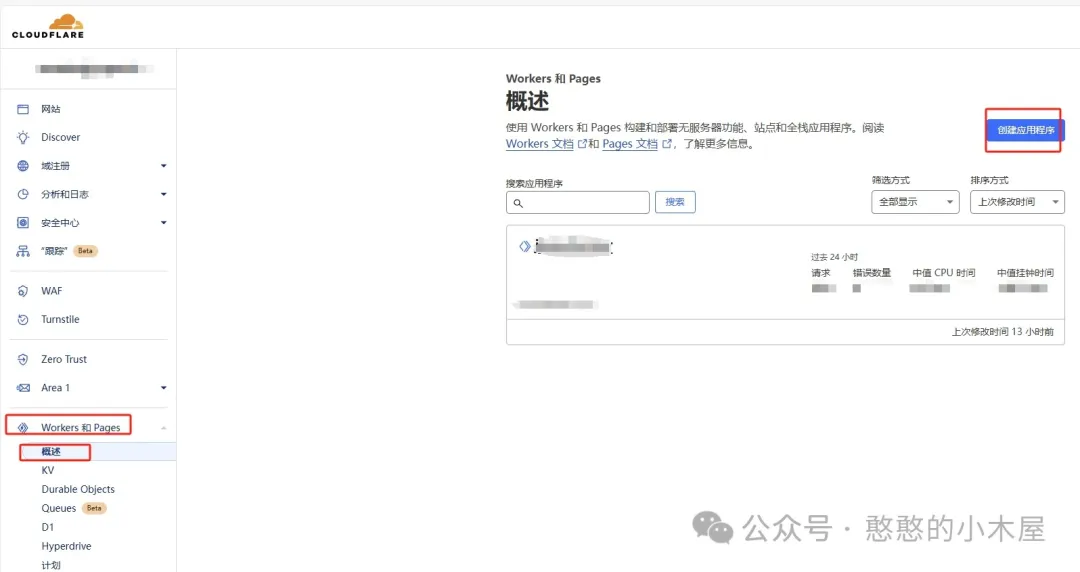
2. Deploy the Service
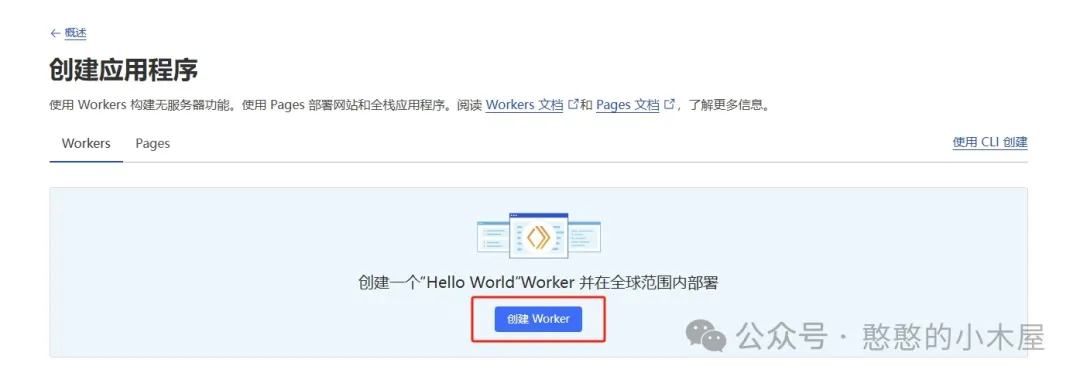
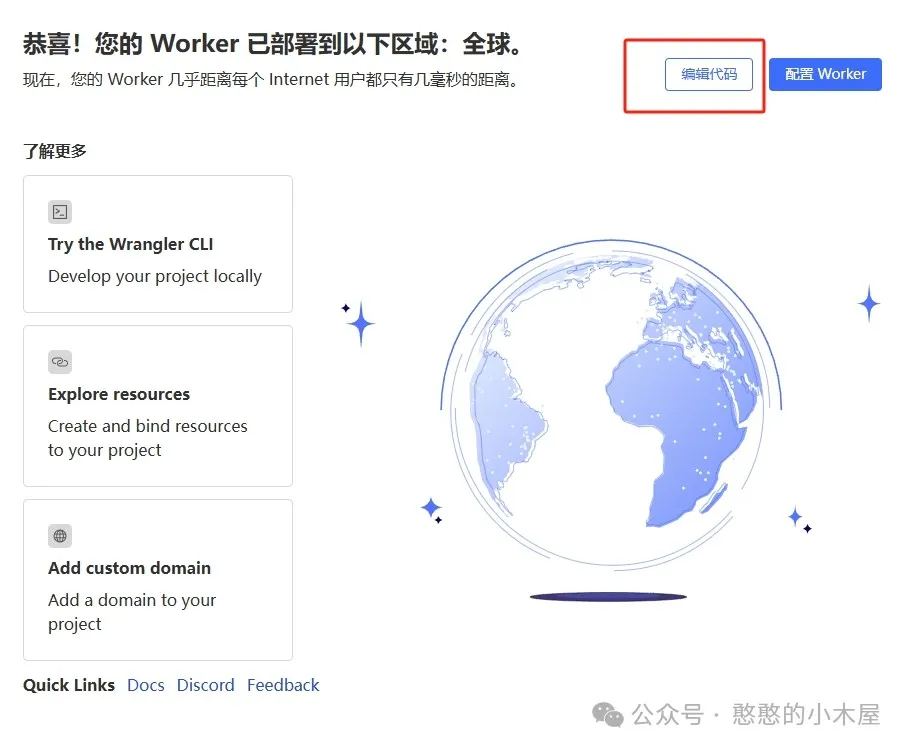
After logging into CF, go to Workers and Pages, then click Overview and create an application.
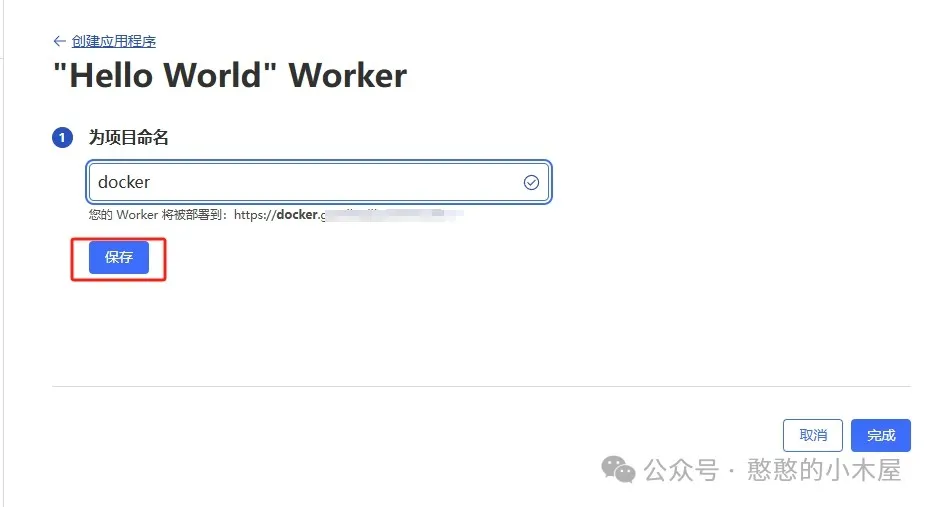
Then click Create Worker, enter a project name. Below, you’ll see a small note: “Your Worker will be deployed to: xxxxx”. This is a domain automatically assigned by CF, which you can use to access this project. Some of you might wonder why you still need your own domain if CF provides one. The answer is simple: the domain assigned by CF is currently not accessible, so you need to bind your own domain. After entering the name, click Save. A default worker.js will appear. You can ignore this for now and click Done.
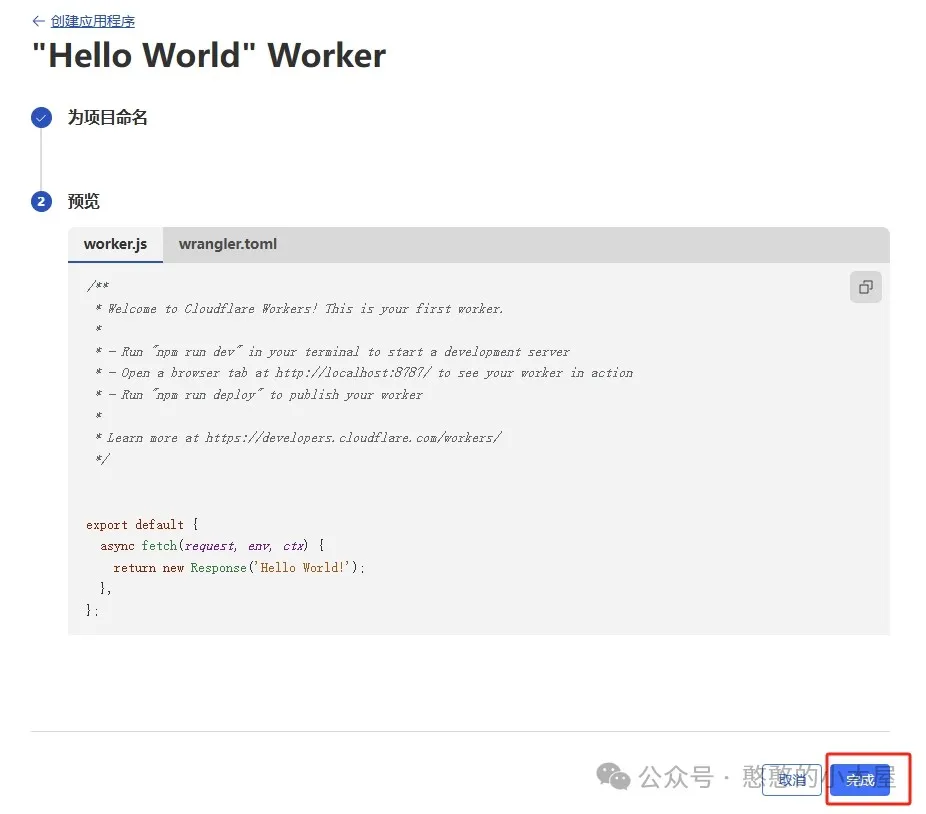
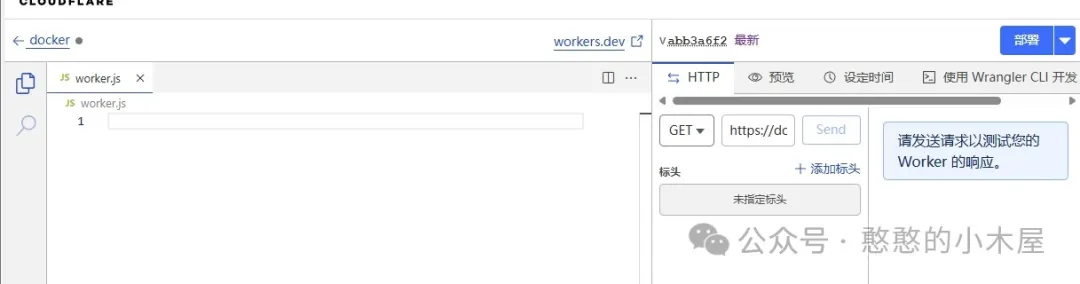
After completion, you’ll see the initial interface. Click Edit Code. Delete the default code first.
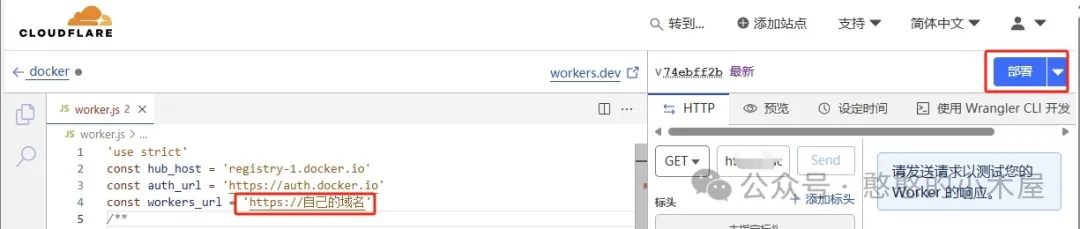
Then copy the following code into it, replace workers_url with your own domain, and click Deploy.
'use strict'
const hub_host = 'registry-1.docker.io'
const auth_url = 'https://auth.docker.io'
const workers_url = 'https://自己的域名'
const PREFLIGHT_INIT = {
    status: 204,
    headers: new Headers({
        'access-control-allow-origin': '*',
        'access-control-allow-methods': 'GET,POST,PUT,PATCH,TRACE,DELETE,HEAD,OPTIONS',
        'access-control-max-age': '1728000',
    }),
}
function makeRes(body, status = 200, headers = {}) {
    headers['access-control-allow-origin'] = '*'
    return new Response(body, {status, headers})
}
function newUrl(urlStr) {
    try {
        return new URL(urlStr)
    } catch (err) {
        return null
    }
}
addEventListener('fetch', e => {
    const ret = fetchHandler(e)
        .catch(err => makeRes('cfworker error:\n' + err.stack, 502))
    e.respondWith(ret)
})
async function fetchHandler(e) {
  const getReqHeader = (key) => e.request.headers.get(key);
  let url = new URL(e.request.url);
  if (url.pathname === '/token') {
      let token_parameter = {
        headers: {
        'Host': 'auth.docker.io',
        'User-Agent': getReqHeader("User-Agent"),
        'Accept': getReqHeader("Accept"),
        'Accept-Language': getReqHeader("Accept-Language"),
        'Accept-Encoding': getReqHeader("Accept-Encoding"),
        'Connection': 'keep-alive',
        'Cache-Control': 'max-age=0'
        }
      };
      let token_url = auth_url + url.pathname + url.search
      return fetch(new Request(token_url, e.request), token_parameter)
  }
  url.hostname = hub_host;
  let parameter = {
    headers: {
      'Host': hub_host,
      'User-Agent': getReqHeader("User-Agent"),
      'Accept': getReqHeader("Accept"),
      'Accept-Language': getReqHeader("Accept-Language"),
      'Accept-Encoding': getReqHeader("Accept-Encoding"),
      'Connection': 'keep-alive',
      'Cache-Control': 'max-age=0'
    },
    cacheTtl: 3600
  };
  if (e.request.headers.has("Authorization")) {
    parameter.headers.Authorization = getReqHeader("Authorization");
  }
  let original_response = await fetch(new Request(url, e.request), parameter)
  let original_response_clone = original_response.clone();
  let original_text = original_response_clone.body;
  let response_headers = original_response.headers;
  let new_response_headers = new Headers(response_headers);
  let status = original_response.status;
  if (new_response_headers.get("Www-Authenticate")) {
    let auth = new_response_headers.get("Www-Authenticate");
    let re = new RegExp(auth_url, 'g');
    new_response_headers.set("Www-Authenticate", response_headers.get("Www-Authenticate").replace(re, workers_url));
  }
  if (new_response_headers.get("Location")) {
    return httpHandler(e.request, new_response_headers.get("Location"))
  }
  let response = new Response(original_text, {
            status,
            headers: new_response_headers
        })
  return response;
}
function httpHandler(req, pathname) {
    const reqHdrRaw = req.headers
    // preflight
    if (req.method === 'OPTIONS' &&
        reqHdrRaw.has('access-control-request-headers')
    ) {
        return new Response(null, PREFLIGHT_INIT)
    }
    let rawLen = ''
    const reqHdrNew = new Headers(reqHdrRaw)
    const refer = reqHdrNew.get('referer')
    let urlStr = pathname
    const urlObj = newUrl(urlStr)
    /** @type {RequestInit} */
    const reqInit = {
        method: req.method,
        headers: reqHdrNew,
        redirect: 'follow',
        body: req.body
    }
    return proxy(urlObj, reqInit, rawLen, 0)
}
async function proxy(urlObj, reqInit, rawLen) {
    const res = await fetch(urlObj.href, reqInit)
    const resHdrOld = res.headers
    const resHdrNew = new Headers(resHdrOld)
    // verify
    if (rawLen) {
        const newLen = resHdrOld.get('content-length') || ''
        const badLen = (rawLen !== newLen)
        if (badLen) {
            return makeRes(res.body, 400, {
                '--error': `bad len: ${newLen}, except: ${rawLen}`,
                'access-control-expose-headers': '--error',
            })
        }
    }
    const status = res.status
    resHdrNew.set('access-control-expose-headers', '*')
    resHdrNew.set('access-control-allow-origin', '*')
    resHdrNew.set('Cache-Control', 'max-age=1500')
    resHdrNew.delete('content-security-policy')
    resHdrNew.delete('content-security-policy-report-only')
    resHdrNew.delete('clear-site-data')
    return new Response(res.body, {
        status,
        headers: resHdrNew
    })
}
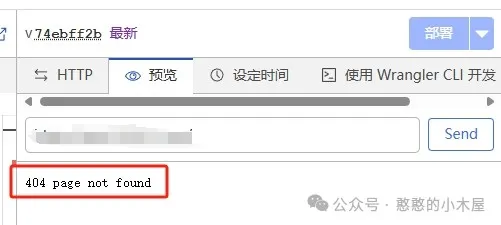
This code doesn’t include a web interface, so accessing it directly will show a 404 error, which is normal. The reason there’s no web interface is that adding one requires modifying several places, and the web interface isn’t useful anyway. It’s better to keep it simple as long as it can ensure normal image pulls.
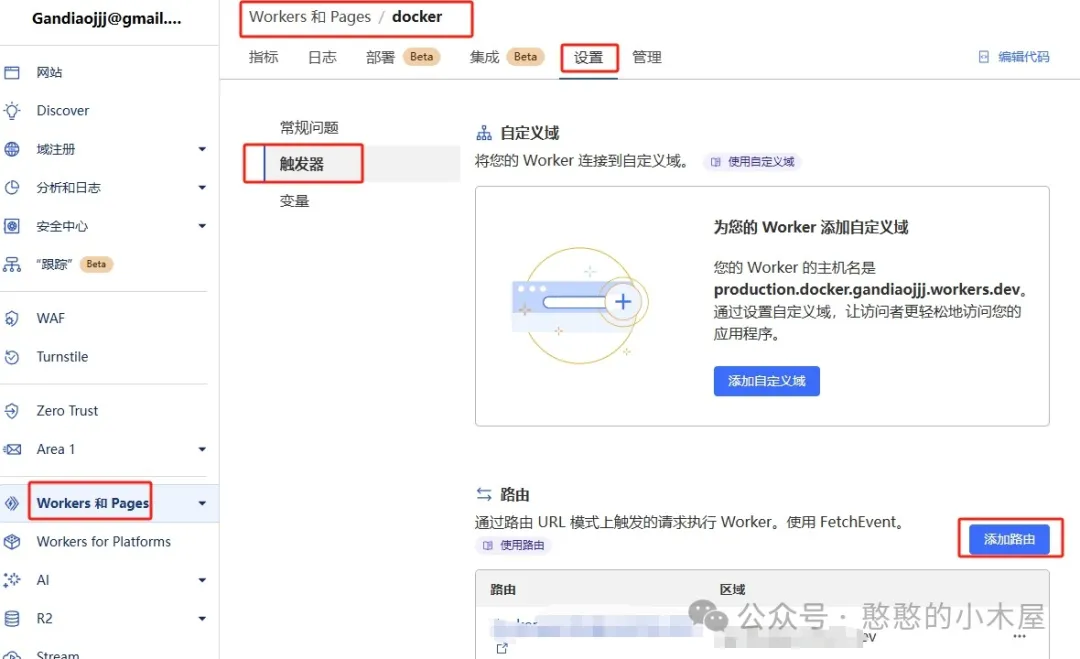
3. Bind Domain and Configure Routes
CF Workers uses the auto-assigned domain by default, which is currently inaccessible. Therefore, you still need to bind your own domain.
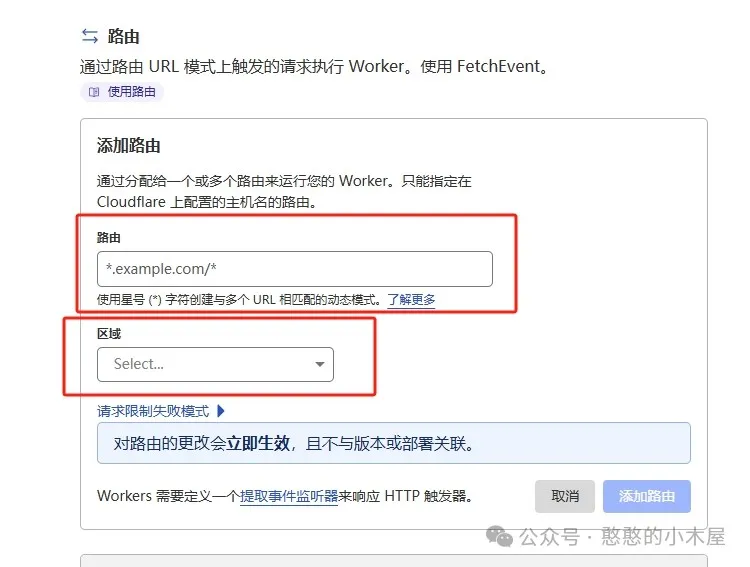
Go to the project details > Settings, select Triggers, and click Add Route. For the route, enter the corresponding subdomain (or main domain). For example, if the main domain is “bbb.com” and you want to pull Docker via “aaa.bbb.com”, then the route should be “aaa.bbb.com/*”. Of course, you can also use the main domain directly without any restrictions. Select the corresponding main domain for Zone and add the route.

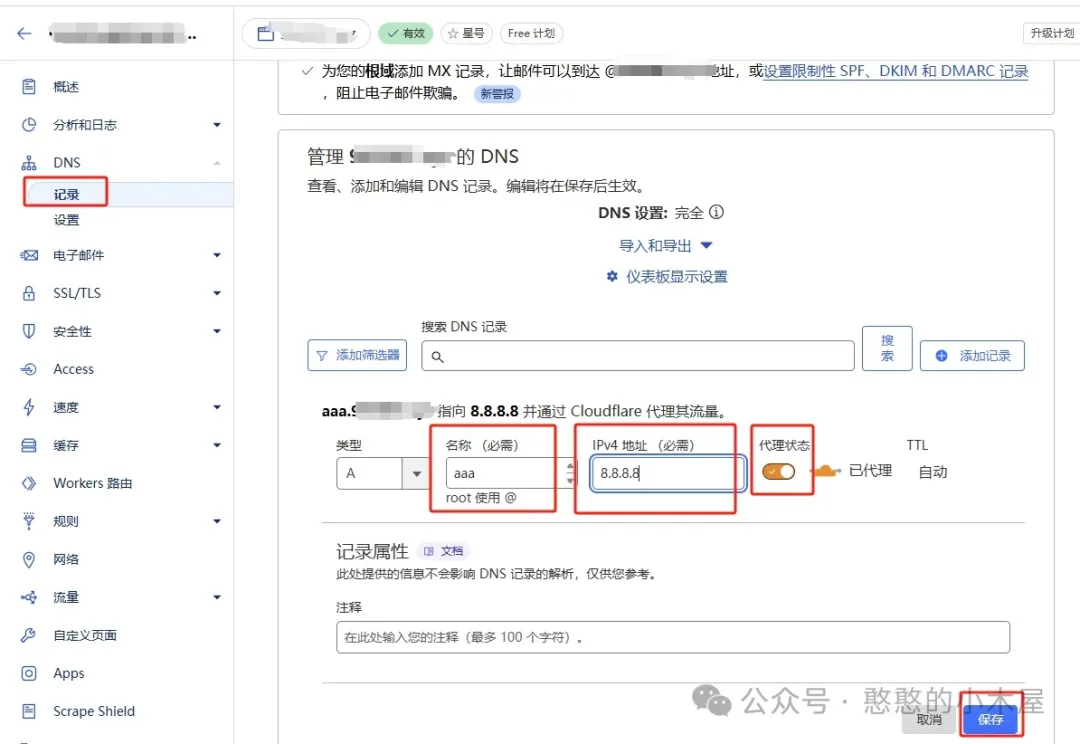
Then go to DNS resolution and add a corresponding subdomain (or main domain) resolution record. For example, if you used “aaa.bbb.com” above, add a corresponding A record here. You can fill in any resolution address, such as 8.8.8.8. Make sure to enable the small cloud icon next to it.
4. Verify and Pull Images
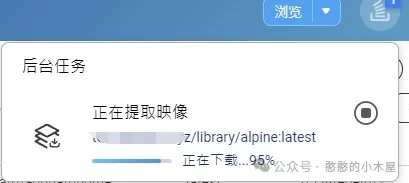
If all the above steps are correct, you can pull Docker images directly. However, you need to modify the corresponding pull commands.
1. Regular Image Pull
For example, the original pull command is as follows:
docker pull library/alpine:latest
Then you need to prepend your own domain:
docker pull 自己的域名/library/alpine:latest
Alternatively, you can directly set the Docker registry and replace it with your own domain:
sudo tee /etc/docker/daemon.json <<EOF
{
    "registry-mirrors": ["https://自己的域名"]
}
EOF
2. Pulling Images on NAS
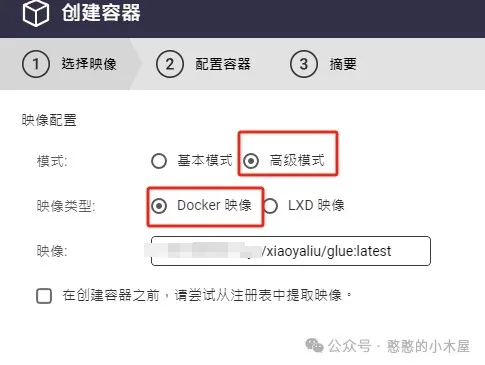
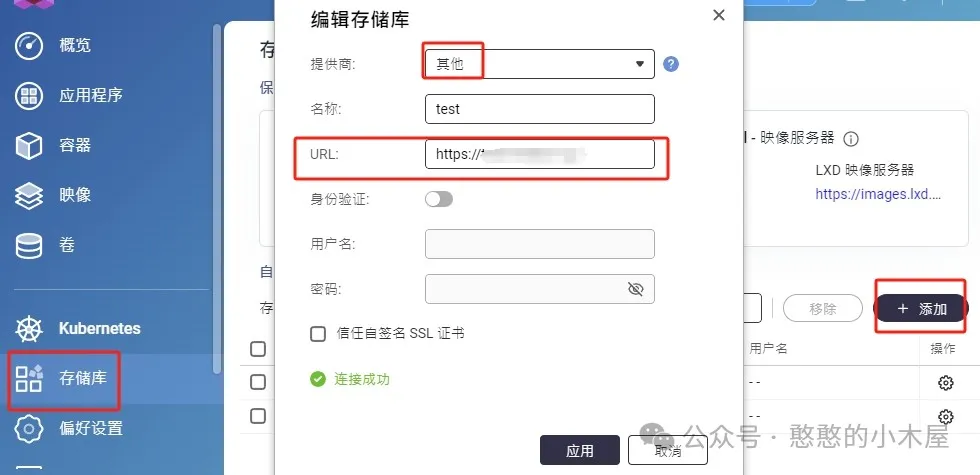
If you’re using a NAS, take QNAP as an example. You can directly select Advanced Mode when adding Docker and enter your own domain to pull Docker. You can also add the corresponding registry in the repository. Note that the provider should be set to Other, and the URL should be complete (including https). Then select the corresponding repository when creating the container.

3. Other
For other systems or devices, modify the corresponding source (registry) according to the methods above.
If the configuration is correct, you can download images normally.
6. Other Notes
-
CF Workers provides a total of 100,000 free request quota per day. It’s almost impossible for regular users to exhaust this, but to prevent abuse, I still recommend adding route and rule restrictions to limit others’ usage.
-
Essentially, this uses CF for traffic relay, which is limited by CF’s speed. If CF is unavailable or slow in your area, you can build your own relay service on a server. I’ll cover this in a future article.
-
Reply with “jsdc” in the background to get the service I’ve set up. However, I cannot guarantee its availability. If it’s abused, I will shut it down directly.