Bypassing the Firewall or Setting Up a Server Farm: V2Ray Configuration with WebSocket + TLS + Web + CDN
v2ray The most secure configuration currently is WebSocket + TLS + Web + CDN. It uses port 443: direct access shows a website, but after connecting with a client it becomes a proxy tool. From the outside it looks like an electric shaver, but it is actually a hair dryer.
1. Check if the system’s time and timezone are correct, otherwise normal connection will not be possible
- The author of this site once couldn’t establish normal connections to
V2Rayfor a whole day due to server time and timezone issues.
date
cp /usr/share/zoneinfo/Asia/Shanghai /etc/localtime
date
2. Prepare your own overseas VPS server
- Purchase an overseas VPS server yourself, needs to be
KVMVPS, don’t accidentally buyOpenVZ, cheap prices mean poor quality - VPS server needs to come with a
dedicated IP
Recommended: VPEasy, established provider, lowest plan 1024M/1CPU/25G SSD/1T bandwidth, KVM architecture, $28 per year, first year use
FirstYearpromo code for 25% off. Author has been purchasing for 6 years, already used for 6 years.
- Overseas VPS servers generally require an overseas
Paypalaccount,VisaorMasterCardcredit card to pay in USD.
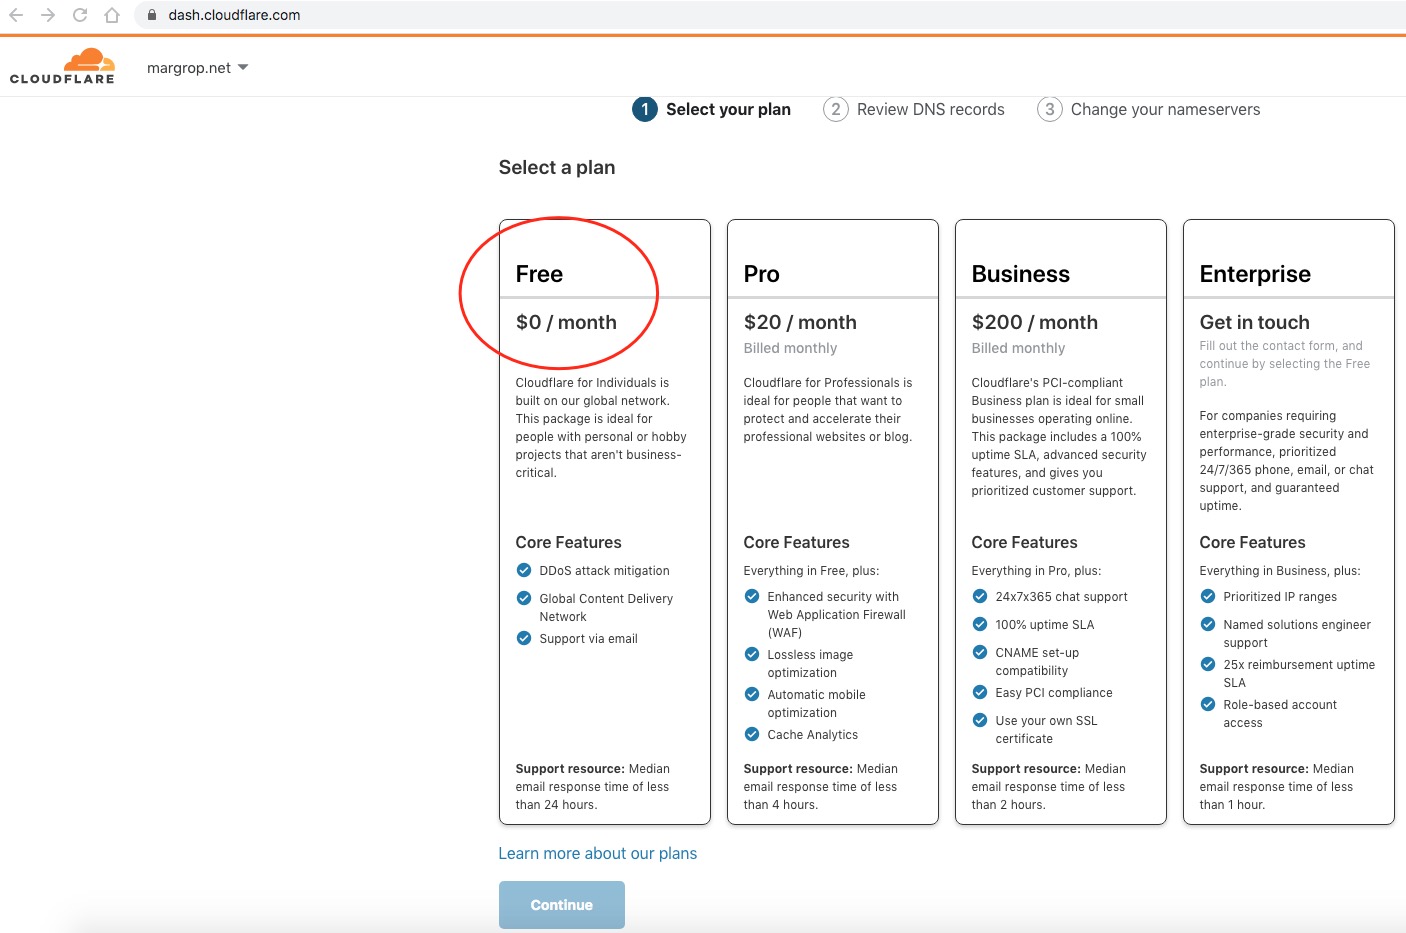
3. Prepare your own CloudFlare account and domain
- Register a top-level domain yourself, and point the domain to `CloudFlare
3.1. Currently the cheapest domains in China
DNSPoddomestic.xyzdomain registration, cheapest registration 6 yuan for 2 years
Visit https://cloud.tencent.com/act/pro/DNSPodDomainsCarnival, claim 2 pieces of 5 yuan coupons Then register a
.xyzdomain with less than 10 digits, new registration 8 yuan, renewal 8 yuan During registration, you can use the 5 yuan coupon, bringing it down to just 3 yuan Then immediately renew for 1 year, can use the 5 yuan coupon again, bringing it down to just 3 yuan Remember: domestic domain registration requiresreal-name verification
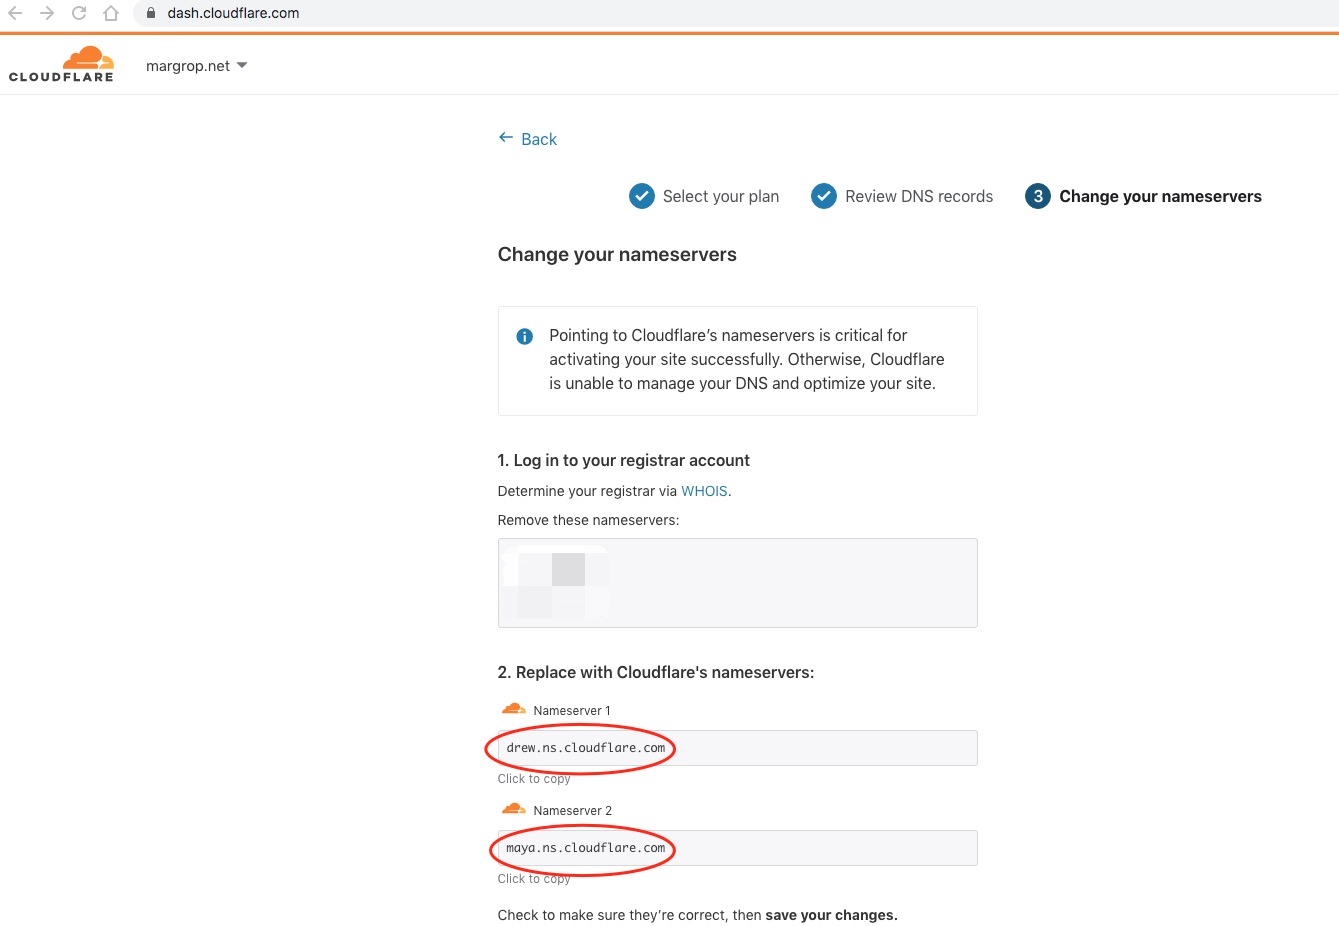
3.2. Registering domain overseas
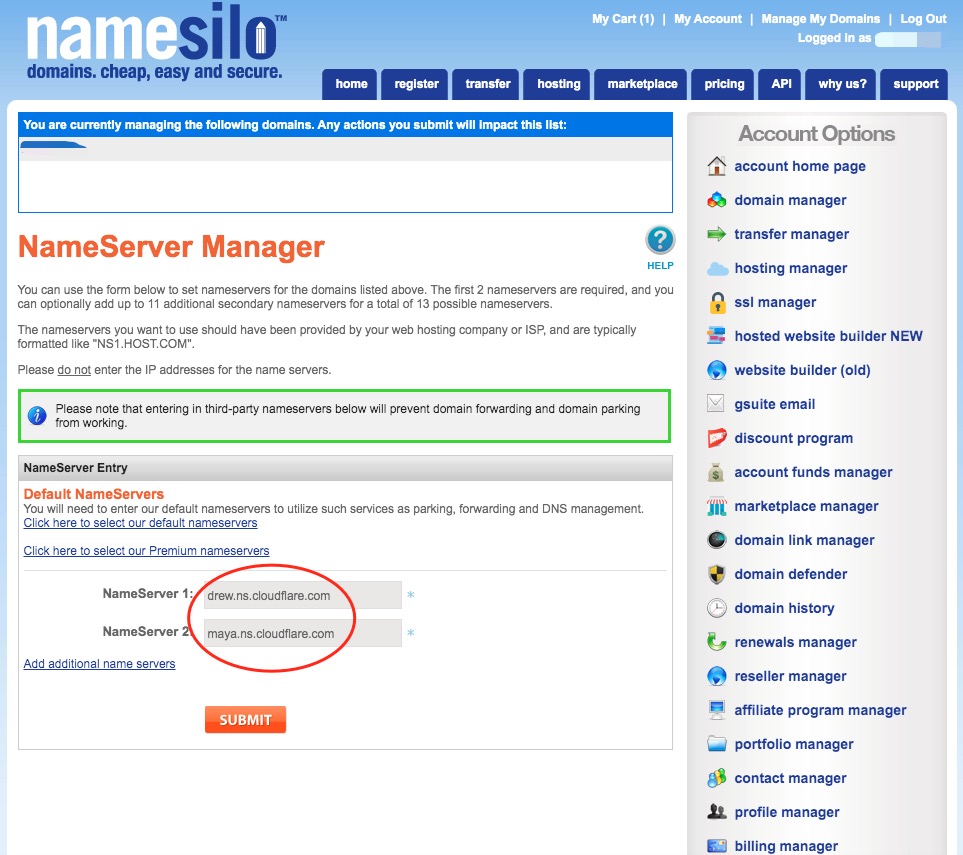
Recommended: https://namesilo.com, recommend a
.topdomain, $4.89 per year Below isnamesile.commethod for modifying domain nameserver, for reference only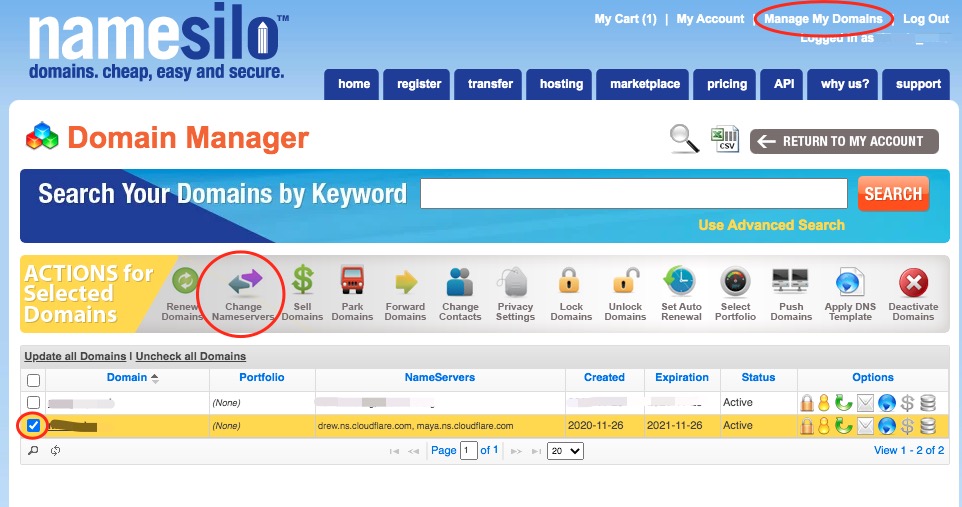
- Register a
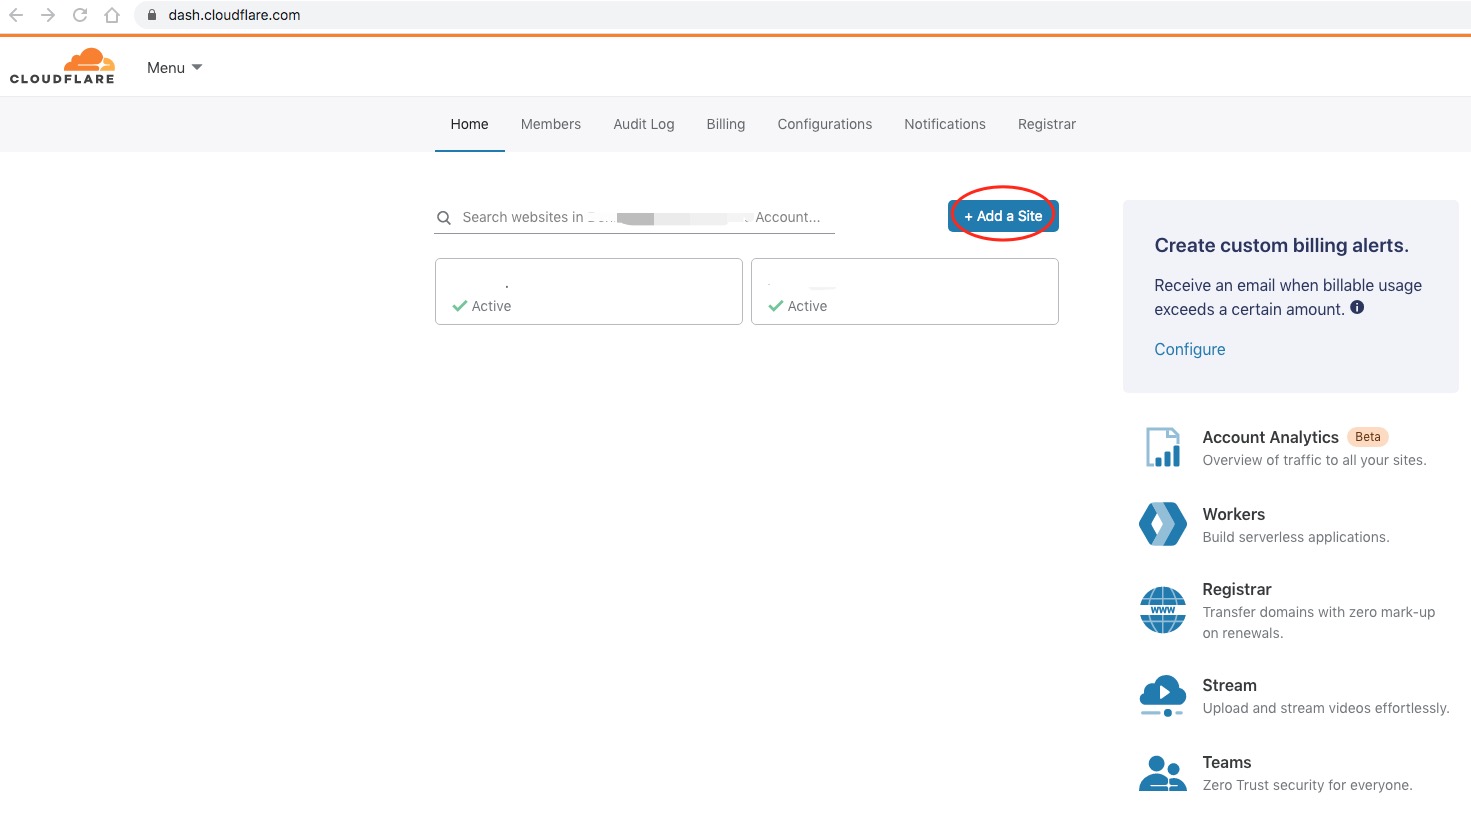
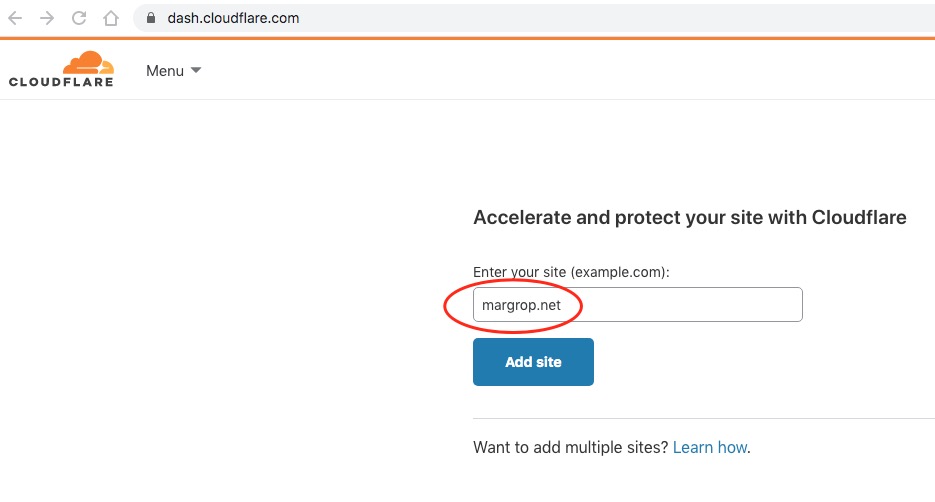
CloudFlareaccount yourself, and add your domain
Entry: https://www.cloudflare.com
- In CloudFlare DNS settings, add a new
subdomainand anA recordpointing to the VPSIP address; setProxy StatustoProxied.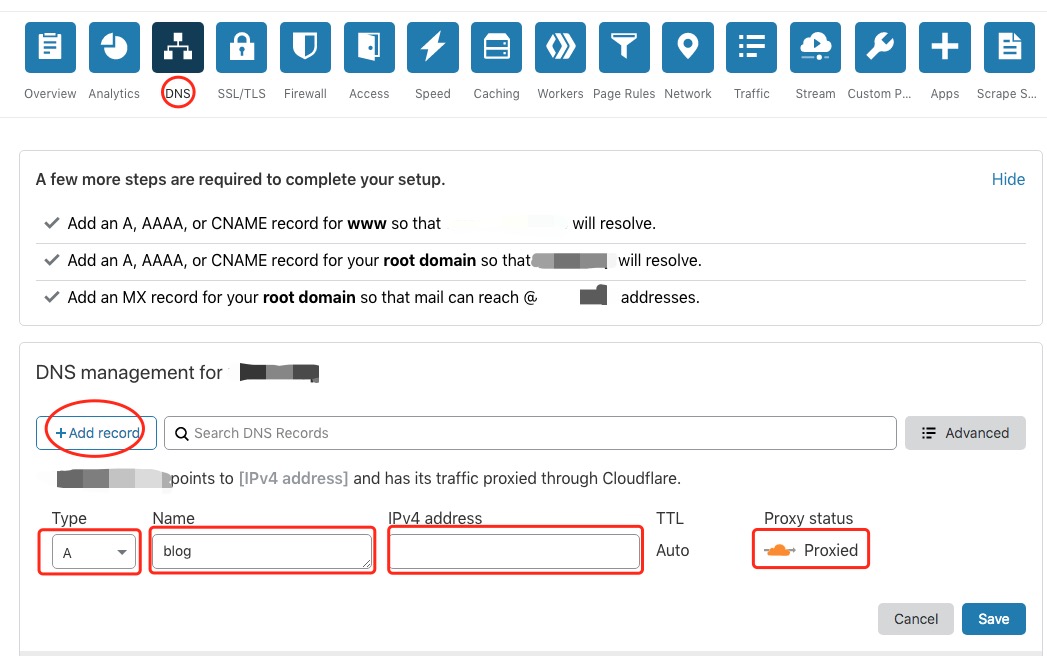
- After adding the subdomain, open the
SSL/TLSsettings in the domain panel and change the encryption mode toFull (strict)if it is not already set.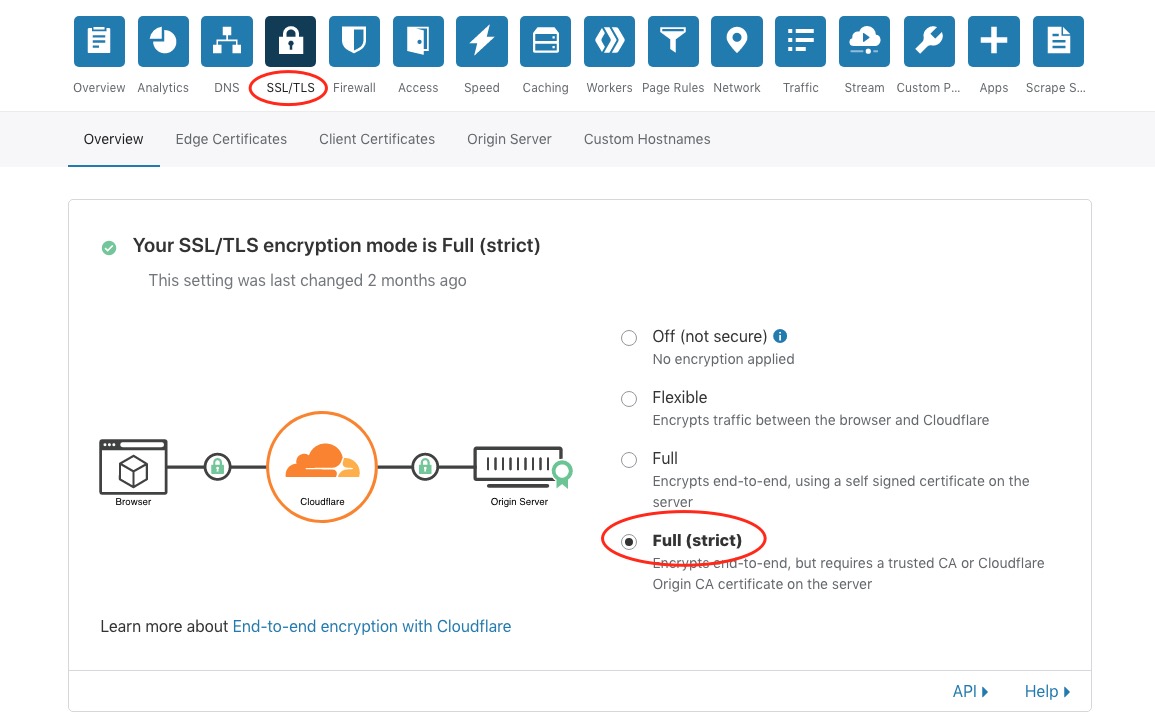
4. Install Caddy2
Other options for providing web services are Nginx and Apache, why choose Caddy2?
Because it’s simple and can automatically apply for SSL certificates.
The Caddy in the original article can no longer be installed normally from the official website, here is how to install Caddy2
Optional: download from official website, or download from this site
Download from official website Caddy2
- Needs to include
CloudFlareplugin - Currently latest version
v2.3.0 h1:fnrqJLa3G5vfxcxmOH/+kJOcunPLhSBnjgIvjXV/QTA= - Go to the official download page
- Select
Platform(most people selectLinux amd64), check the CloudFlare plugin, then clickDownload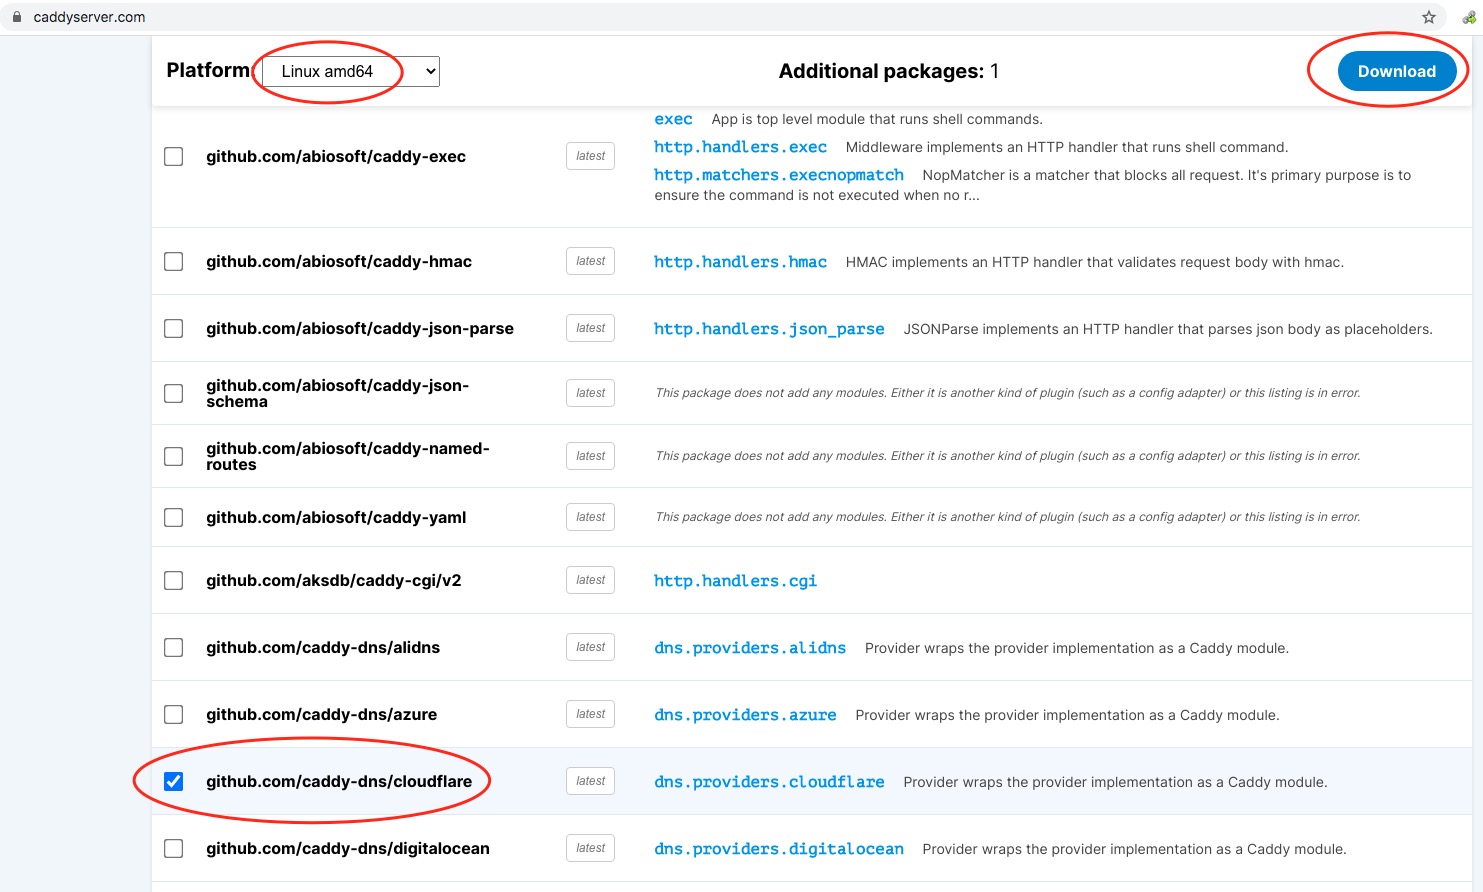
- Upload the downloaded
Caddy2file to the~/tools/caddydirectory on the VPS.
Download from this site Caddy2
- Includes
CloudFlareplugin - Currently older version
v2.2.1 h1:Q62GWHMtztnvyRU+KPOpw6fNfeCD3SkwH7SfT1Tgt2c= - Go to the
~/tools/caddydirectory on the VPS, runwgetcommand
mkdir -p ~/tools/caddy
cd ~/tools/caddy
wget -O caddy2 https://download.margrop.net/d/oneindex/CENTOS/caddy2_2.2.1
- Check
Caddy2version
chmod +x caddy2
caddy2 -version
5. Install v2ray
v2rayone-click installation command
bash <(curl -L https://raw.githubusercontent.com/v2fly/fhs-install-v2ray/master/install-release.sh)
v2raynormal installation log
installed: /usr/local/bin/v2ray
installed: /usr/local/bin/v2ctl
installed: /usr/local/share/v2ray/geoip.dat
installed: /usr/local/share/v2ray/geosite.dat
installed: /usr/local/etc/v2ray/config.json
installed: /var/log/v2ray/
installed: /var/log/v2ray/access.log
installed: /var/log/v2ray/error.log
installed: /etc/systemd/system/v2ray.service
installed: /etc/systemd/system/v2ray@.service
removed: /tmp/tmp.iO3bDdOqa9
info: V2Ray v4.33.0 is installed.
You may need to execute a command to remove dependent software: yum remove curl unzip
Please execute the command: systemctl enable v2ray; systemctl start v2ray
6. Configure and start v2ray
- Edit
v2rayconfiguration file
vim /usr/local/etc/v2ray/config.json
- The
UUIDin the JSON file is like a password, please generate it yourself and keep it safe
Mac/Unix/Linux systems: enter
uuidgenin console, this generatesUUIDWindows systems: enter[guid]::NewGuid()in PowerShell console, this generatesUUID
- The
{RANDOM_PATH}in the JSON file is the WebSocket access URL, based on current usage experience, it’s best to use random strings.
{
  "inbound": {
    "port": 10000,
    "listen":"127.0.0.1",
    "protocol": "vmess",
    "settings": {
      "clients": [
        {
          "id": "E5B33B5A-A241-4246-B8D9-A260FBBAFCCF",
          "alterId": 64
        }
      ]
    },
    "streamSettings": {
      "network": "ws",
      "wsSettings": {
      "path": "/{RANDOM_PATH}"
      }
    }
  },
  "outbound": {
    "protocol": "freedom",
    "settings": {}
  }
}
- Start V2Ray
systemctl start v2ray
- Set V2Ray to start on boot
systemctl enable v2ray
7. Configure Caddyfile2
Create Caddyfile2 file in /etc/caddy directory, create directory if it doesn’t exist, edit Caddyfile2 file
mkdir /etc/caddy
cd /etc/caddy
vim /etc/caddy/Caddyfile2
- Below is
blog.margrop.netdomain which is this site’s domain, please modify as needed, recommend using the subdomain configured above. {RANDOM_PATH}, must be the same as configured above.- The
dns cloudflaresetting here uses CloudFlare’s API key. Adjust it as needed; see the plugin documentation.
blog.margrop.net
{
    root * /usr/share/caddy
    file_server
    log {
        output file /var/log/caddy/vps.log
    }
    tls {
        dns cloudflare g9_uKv1RrXXXXXXHOPfXXXXXXYNZGXXXXXXJh3qp
    }
    @v2ray_websocket {
        path /{RANDOM_PATH}
        header Connection *Upgrade*
        header Upgrade websocket
    }
    reverse_proxy @v2ray_websocket localhost:10000
}
8. Configure Caddy JSON
Caddy2main configuration file isCaddy JSON, but this configuration file is too difficult to write.- So we convert the
Caddyfile2file edited in the previous step toCaddy JSONfile
cd ~/tools/caddy
./caddy2 adapt --config /etc/caddy/Caddyfile2 > ~/tools/caddy/config.json
cat ~/tools/caddy/config.json
9. Start and upload Caddy JSON
- Start
Caddy2
cd ~/tools/caddy
./caddy2 start
- Upload
Caddy JSON
curl localhost:2019/config/
curl localhost:2019/load -X POST -H "Content-Type: application/json" -d @config.json
curl localhost:2019/config/
10. v2ray client configuration
v2rayclient recommended to keep same version as server- Here the client has both
socks5proxy andhttpproxy enabled simultaneously, no authentication,socks5proxy uses1080port,httpproxy uses1081port, and both support LAN connections, convenient for other devices on the same network to catch a ride.
{
    "inbounds": [
        {
            "port": 1080,
            "listen": "0.0.0.0",
            "protocol": "socks",
            "domainOverride": [
                "tls",
                "http"
            ],
            "settings": {
                "auth": "noauth",
                "udp": false
            }
        },
        {
            "port": 1081,
            "listen": "0.0.0.0",
            "protocol": "http",
            "domainOverride": [
                "tls",
                "http"
            ],
            "settings": {
                "auth": "noauth",
                "udp": false
            }
        }
    ],
    "outbound": {
        "protocol": "vmess",
        "settings": {
            "vnext": [
                {
                    "address": "blog.margrop.net",
                    "port": 443,
                    "users": [
                        {
                            "id": "E5B33B5A-A241-4246-B8D9-A260FBBAFCCF",
                            "alterId": 64
                        }
                    ]
                }
            ]
        },
        "streamSettings": {
            "network": "ws",
            "security": "tls",
            "wsSettings": {
                "path": "/{RANDOM_PATH}"
            }
        }
    }
}
UUID, domain, and {RANDOM_PATH} must match the server configuration.
11. Trial run
看看有没有报错,没有报错就访问下网站看是否正常,如果正常就证明caddy2配置无误。
All operations above personally verified on CentOS 7, it works. This document is currently a simplified operation guide, will gradually add detailed operation steps for each step in the future.
12. Configure Caddy2 to auto-start
Create or edit caddy2.service file Edit the service file using the following command:
sudo nano /etc/systemd/system/caddy2.service
Update the service file content with the following
[Unit]
Description=Start Caddy with Config on Boot
After=network.target

[Service]
User=root
WorkingDirectory=/root/tools/caddy
ExecStart=/root/tools/caddy/caddy2 run --config /root/tools/caddy/config.json
wqRestart=on-failure
Environment=HOME=/root

[Install]
WantedBy=multi-user.target
Reload systemd configuration and start the service After saving and closing the file, execute the following commands:
sudo systemctl daemon-reload
sudo systemctl restart caddy2.service
sudo systemctl enable caddy2.service
Verify service status Check if service is running normally:
sudo systemctl status caddy2.service
13. Archive, Caddy1 usage method
#测试运行
caddy -agree -conf /etc/caddy/Caddyfile
#正式运行
nohup caddy -agree -conf /etc/caddy/Caddyfile > /root/caddy.log 2>&1 &
References
V2Ray configuration with WebSocket + TLS + Web WebSocket+TLS+Web Module dns.providers.cloudflare Caddyfile Quick-start Install