Claude Code Too Heavy? Try the Bare-Bones pi, Then Add the Full-Stack oh-my-pi
TL;DR
If you are tired of all-in-one AI coding assistants, try pi — it gives the model only four tools (read, write, edit, bash) by default and lets you install everything else yourself. If you prefer a “plug-and-play” experience, try its fork oh-my-pi (command name
omp) — 31 built-in tools, sub-agents, code review, and a debugger included. Both can coexist on the same machine. This article provides one-click install scripts for Windows 11, Ubuntu 26.04, and macOS 26, plus both a manual and an Agent-assisted setup path.Commands were executed on real machines in late August 2026. All examples are abstracted and contain no real IP addresses, host names, or secrets.
Why Another Two Tools?
Background: Coding agents are turning into full IDEs
Over the past two years, terminal-based AI coding assistants have become more and more bloated. For developers who prefer lightweight tools, this feels like walking into a store to buy a screwdriver and walking out with a 128-piece household toolkit — useful, but you only ever needed one.
The author of pi, Mario Zechner (badlogic, known for the libGDX game framework), took the opposite approach: give the model the smallest possible kernel and let users assemble the rest. That is pi.
oh-my-pi, by Can Bölük (can1357), forked pi and went to the other extreme: pre-install everything people usually want. Its command name is omp.
How the two relate
Think of pi as a Swiss Army knife handle — you get the handle out of the box, but you have to pick and attach the blades, scissors, and bottle opener yourself. oh-my-pi is a ready-to-use toolbox — hammer, drill, and spirit level already inside, open it and get to work.
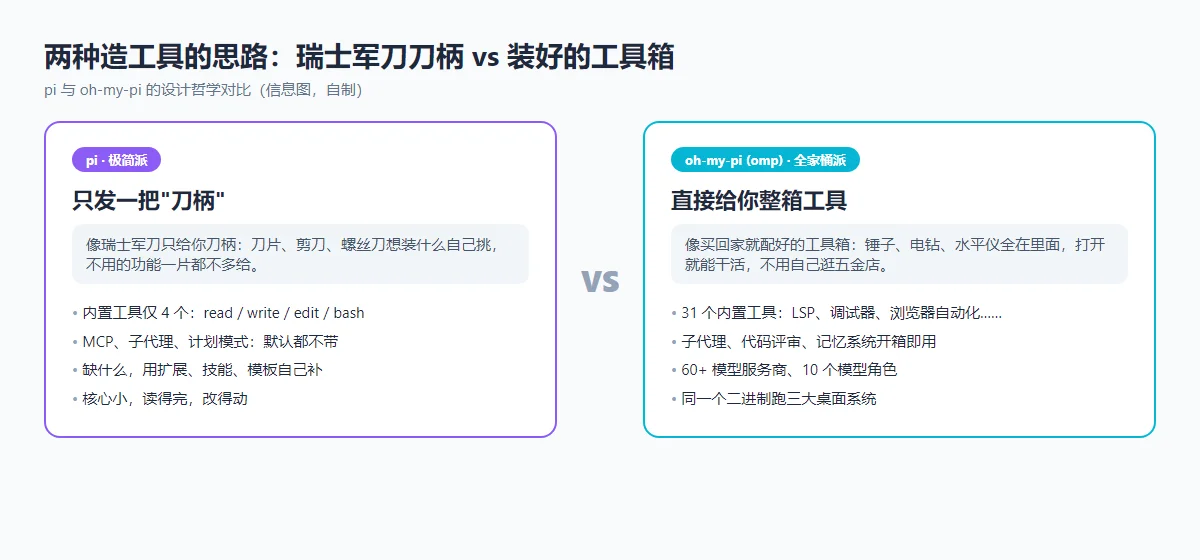
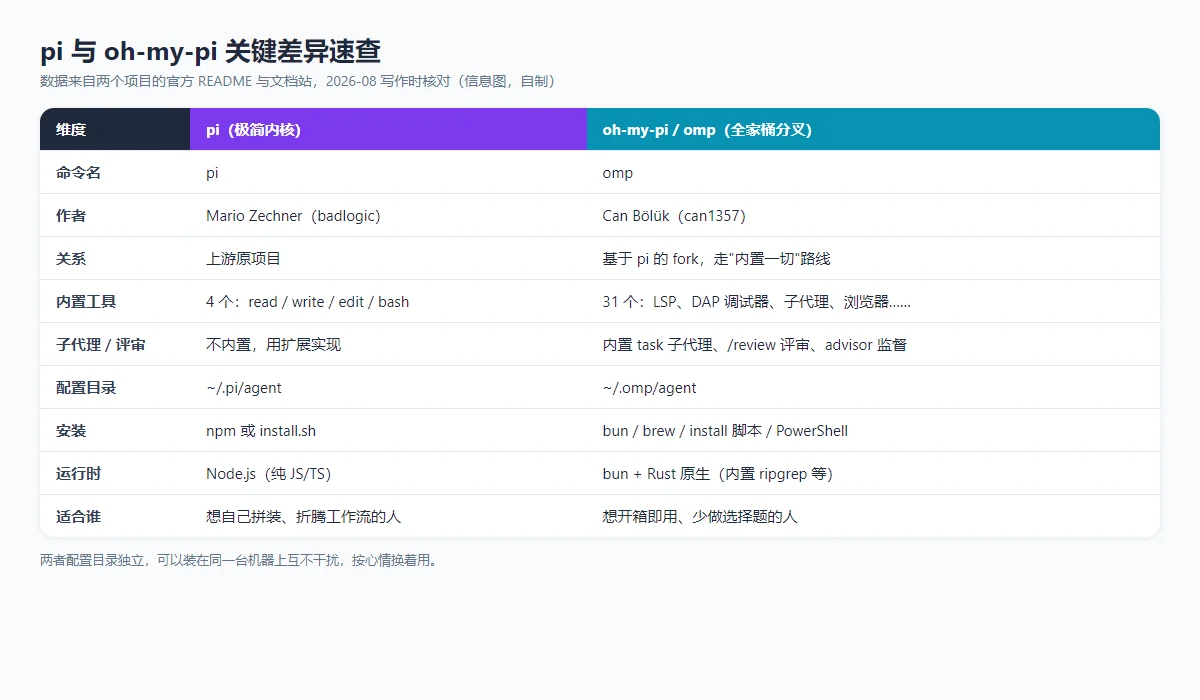
Both projects are open source (MIT). Their config directories do not conflict (~/.pi/agent vs ~/.omp/agent), so you can install both on the same machine and switch between them freely.
pi: A Minimal Coding Agent with Only 4 Tools
What is pi
pi is a terminal AI coding assistant whose defining trait is restraint: the model gets exactly four tools by default — read file, write file, edit file, run shell command. No built-in MCP, no sub-agents, no plan mode, no permission pop-ups.
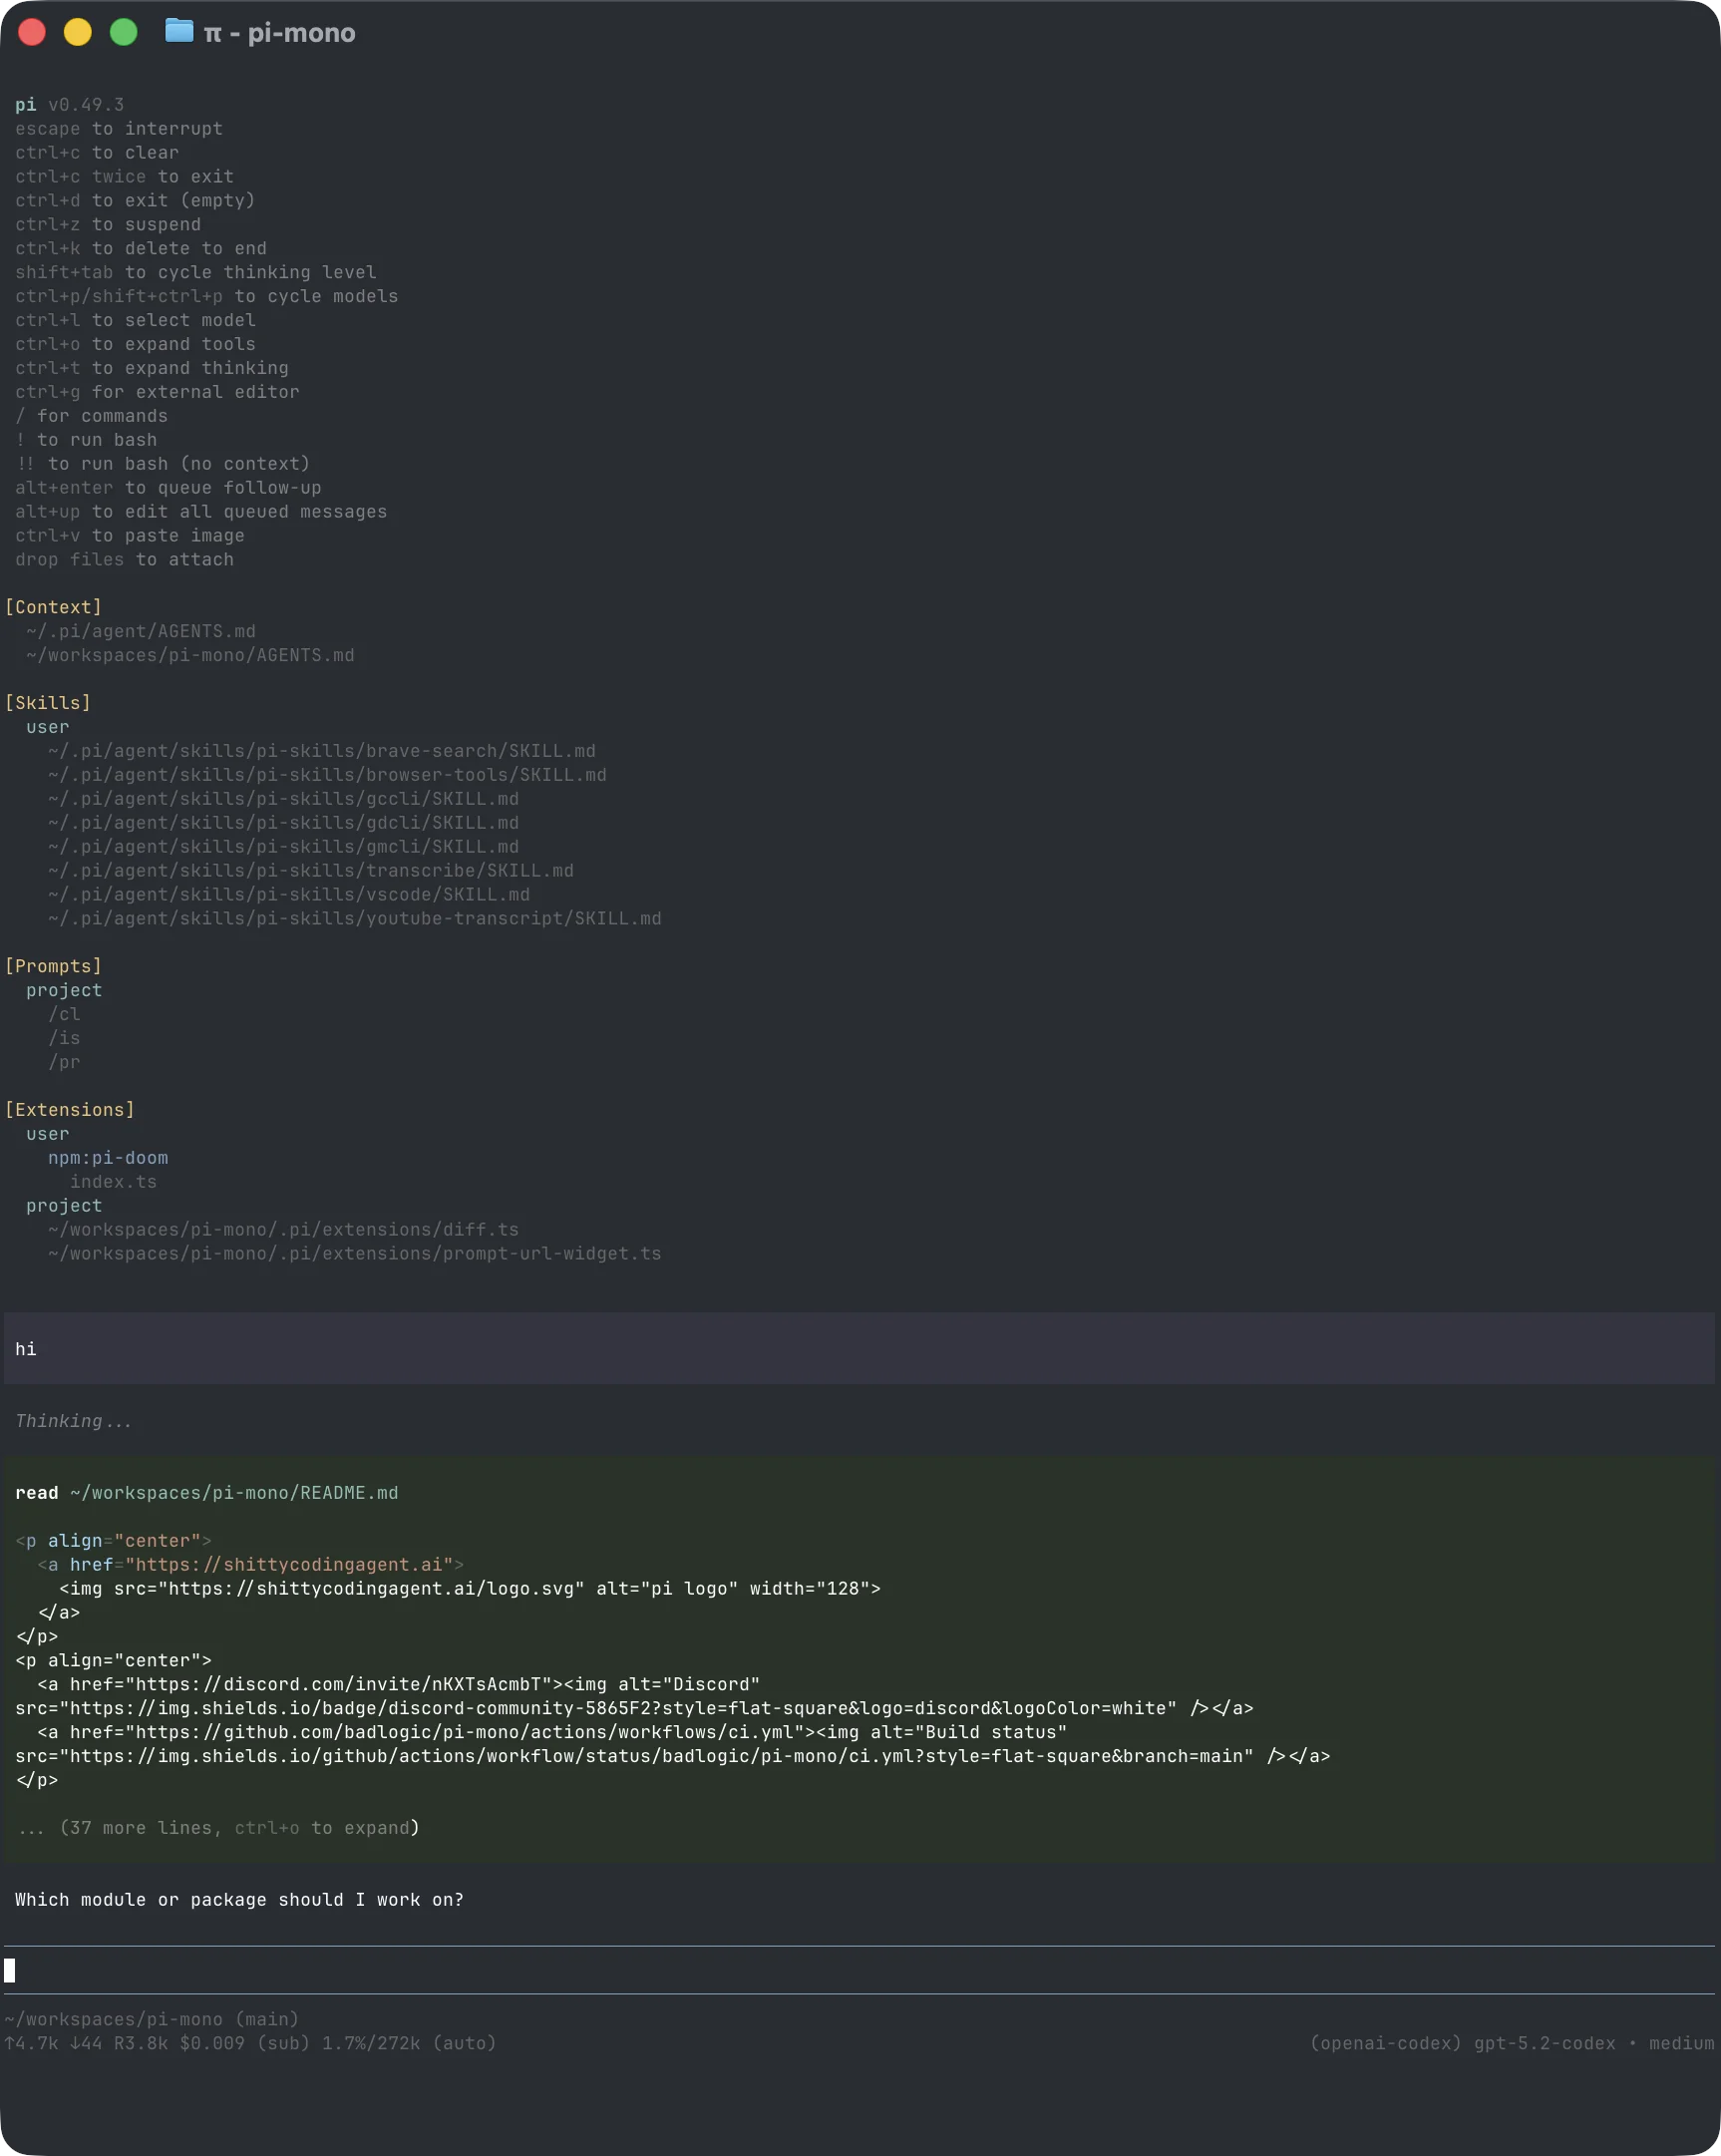
What about missing features? pi answers with four extension mechanisms:
- Extensions: TypeScript plugins that can add tools, commands, and UI.
- Skills: Markdown playbooks in the Agent Skills standard.
- Prompt Templates: Re-usable prompt snippets.
- Themes: Color schemes.
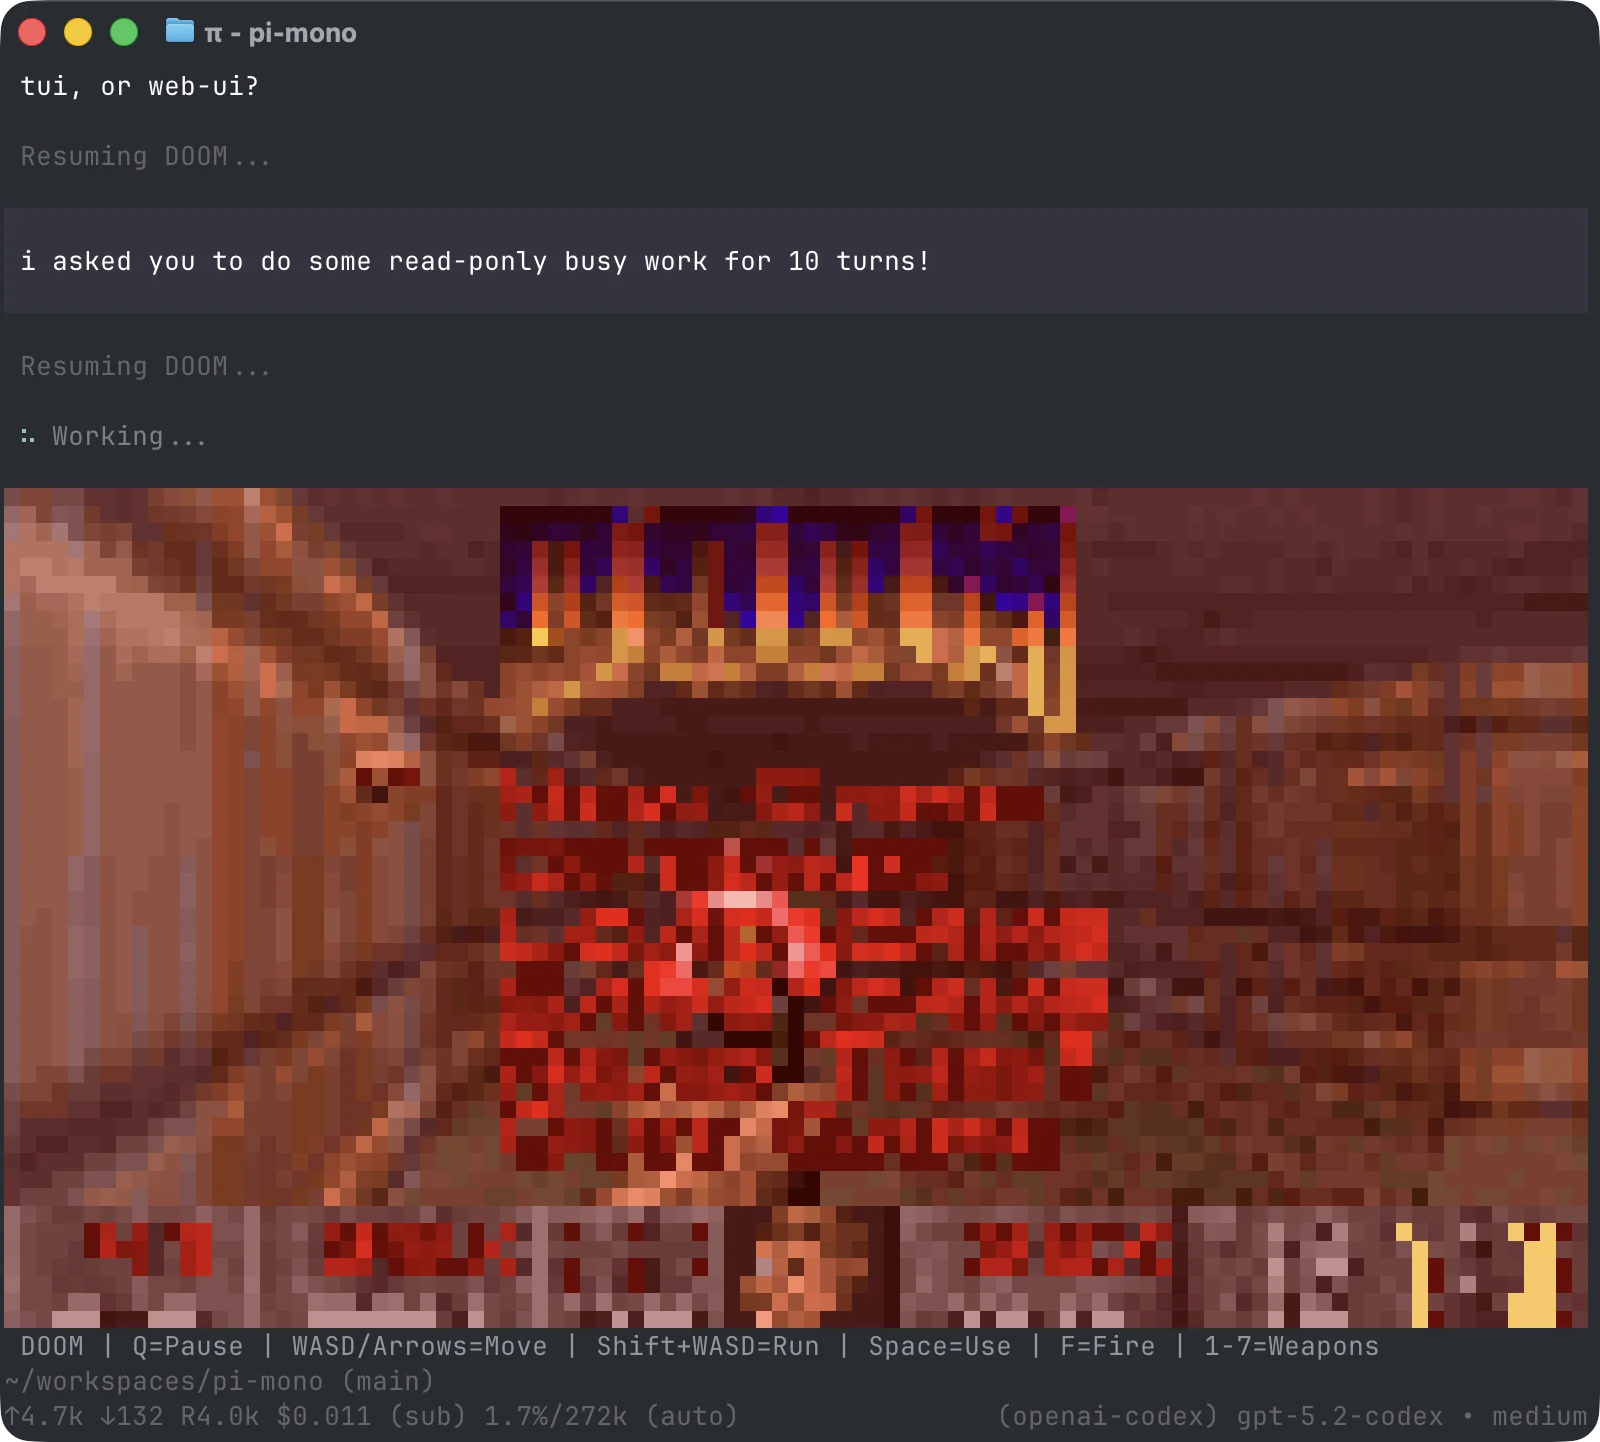
These can be packaged as “Pi Packages” and shared via npm or GitHub. The official README even shows running Doom inside pi — demonstrating how far the extension system can go.
pi highlights worth knowing
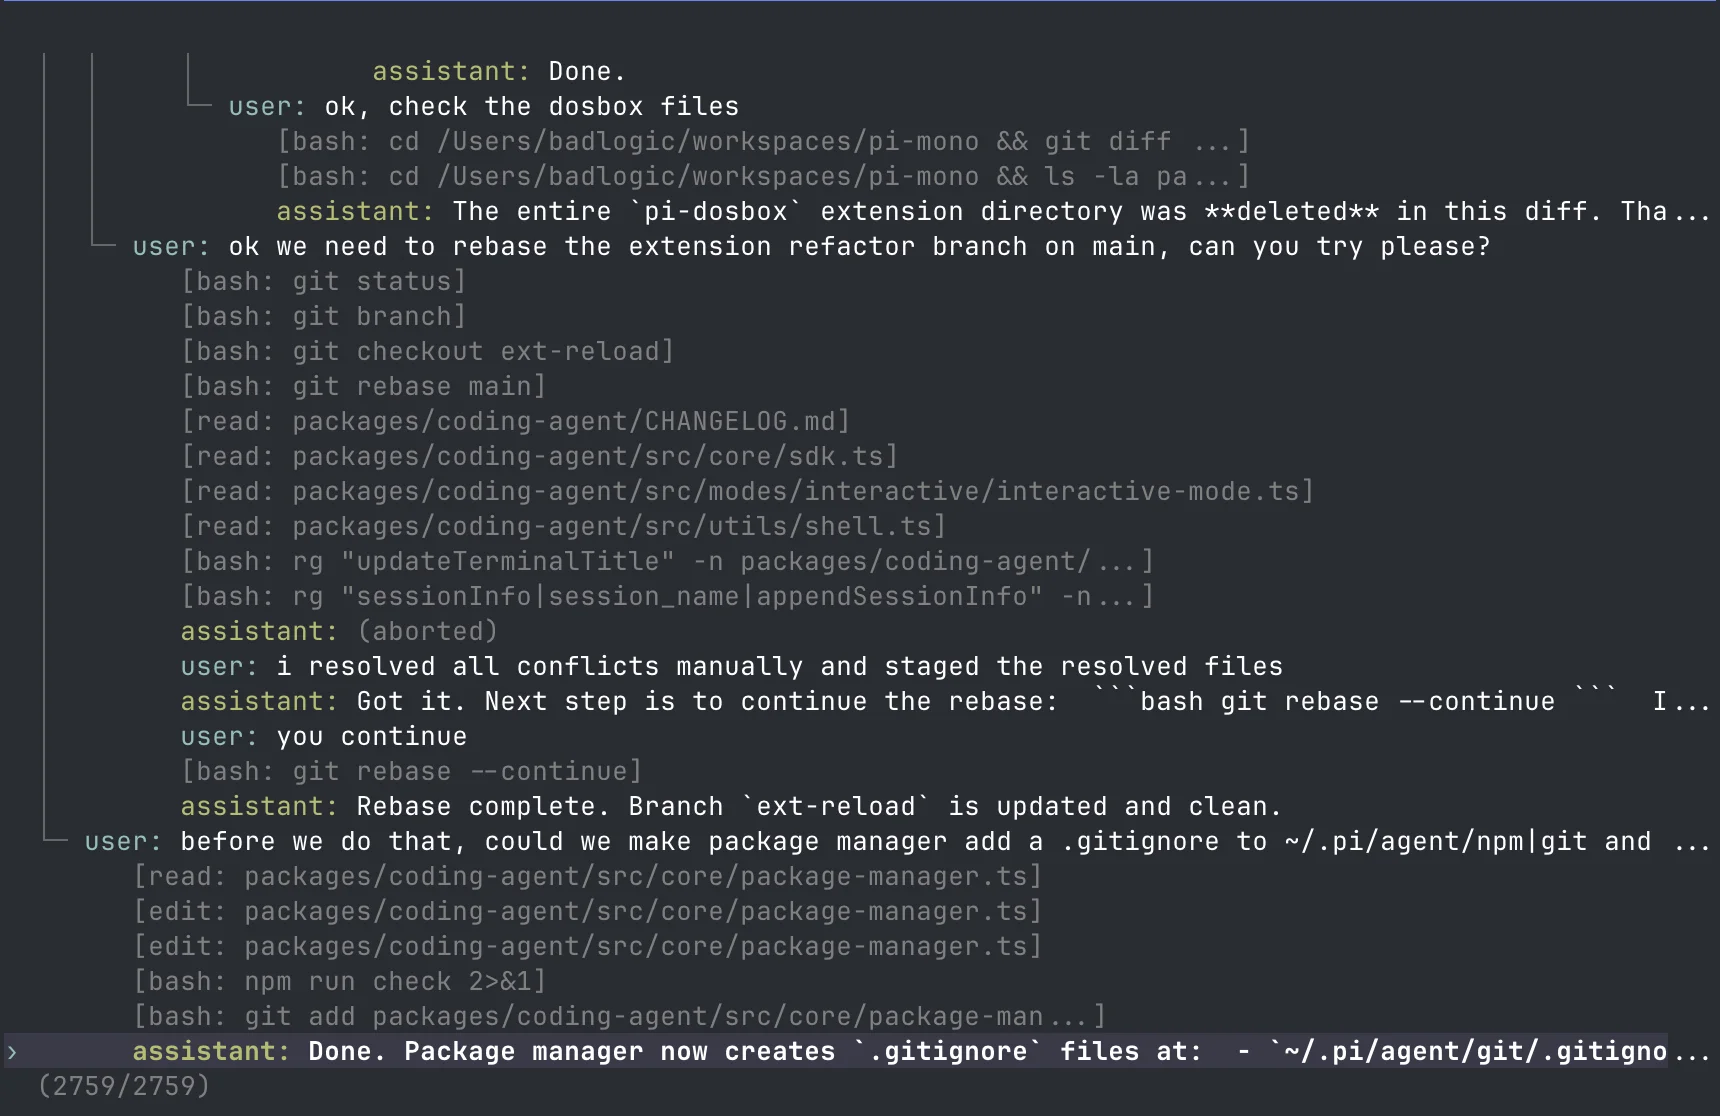
- Tree-structured sessions: Each session is a JSONL file. You can branch at any point, like Git branches. The
/treecommand shows the full session tree and lets you jump to any branch.
- 30+ providers: OpenAI, Anthropic, Gemini, DeepSeek, Kimi, OpenRouter, and local llama.cpp. Log in with
/login. - Editor shortcuts:
@fuzzy-finds files,!cmdsends command output to the model,Ctrl+Vpastes images.
Installing pi
pi requires Node.js 20 or newer. Pick one method:
# Method 1: npm global install (verified at v0.74.2)
npm install -g --ignore-scripts @earendil-works/pi-coding-agent

# Method 2: official install script
curl -fsSL https://pi.dev/install.sh | sh
Set an API key and run:
export ANTHROPIC_API_KEY="your-key"
pi
Note: pi has moved from
badlogic/pi-monotoearendil-works/pi. The old npm scope@mariozechner/*still works as an alias, but prefer@earendil-works/*.
oh-my-pi (omp): The Batteries-Included Fork
What is omp
If pi’s philosophy is “install what you need,” omp’s is “install everything, ignore what you don’t.” Its command name is omp.

Built-in tools (31 total), a few highlights:
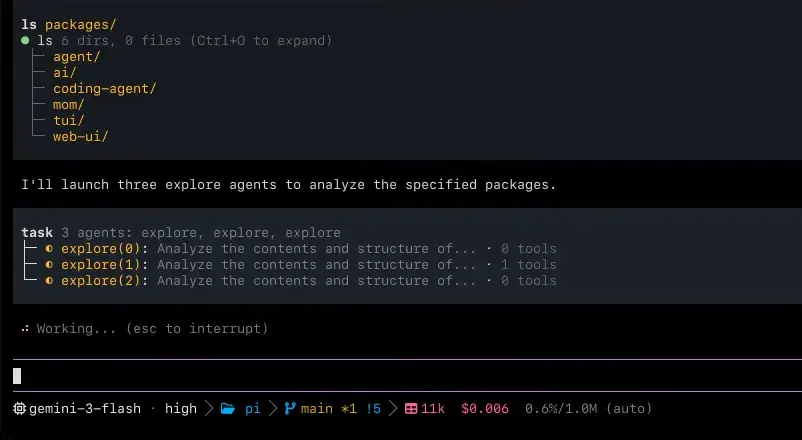
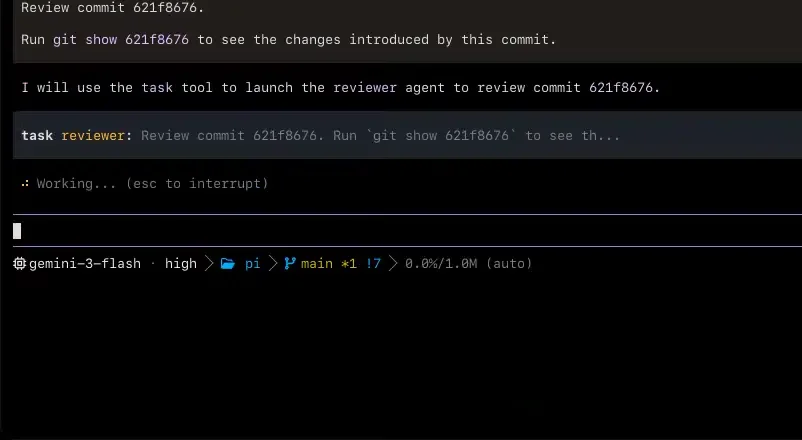
- Sub-agents (task): Launch multiple agents in parallel, each in an isolated worktree.
- LSP + Debugger: The model understands code structure like an IDE and can set breakpoints.
- Code review (
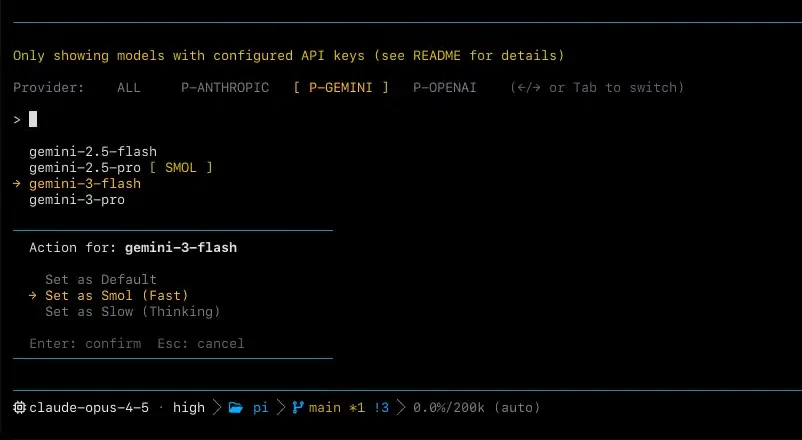
/review): One-click review with P0–P3 severity grading. - Model roles: Assign different models to different tasks — expensive for hard work, cheap for chores.
Hashline editing: the most clever idea in this article
omp introduces Hashline editing. Here is why it matters.
Traditional AI file editing is like asking a student to rewrite an essay by copying the original paragraph word-for-word before writing the revised version. The longer the paragraph, the higher the chance of a typo — and one typo breaks the whole edit.
Hashline works differently: the tool computes a “house number” (hash) for each line. The model only has to say “replace line with house number 3 by this new content.” No need to recite the original text. It turns a memorization task into a fill-in-the-blank task.
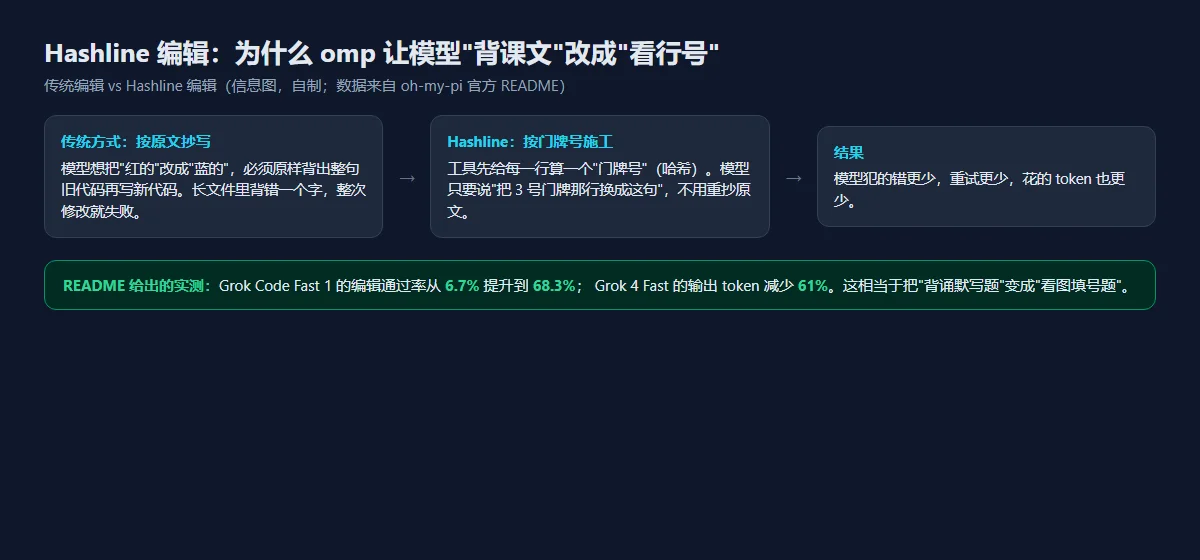
Official README numbers: Grok Code Fast 1 edit pass rate went from 6.7% to 68.3%, and Grok 4 Fast output tokens dropped by 61%. For users on smaller or local models, this drastically reduces the “tried three times and still got it wrong” frustration.
Installing omp
omp is built on bun. Recommended methods:
# Method 1: bun global install (officially recommended)
bun install -g @oh-my-pi/pi-coding-agent

# Method 2: official install script (macOS / Linux)
curl -fsSL https://omp.sh/install | sh

# Method 3: macOS Homebrew
brew install can1357/tap/omp

# Method 4: Windows PowerShell
irm https://omp.sh/install.ps1 | iex
After installation, omp setup launches an interactive wizard to pick a model. omp also auto-imports existing rules from .claude, .cursor, and .codex directories, so migration from other tools is nearly zero-cost.
Side-by-Side Comparison
Still undecided? Answer these five questions:
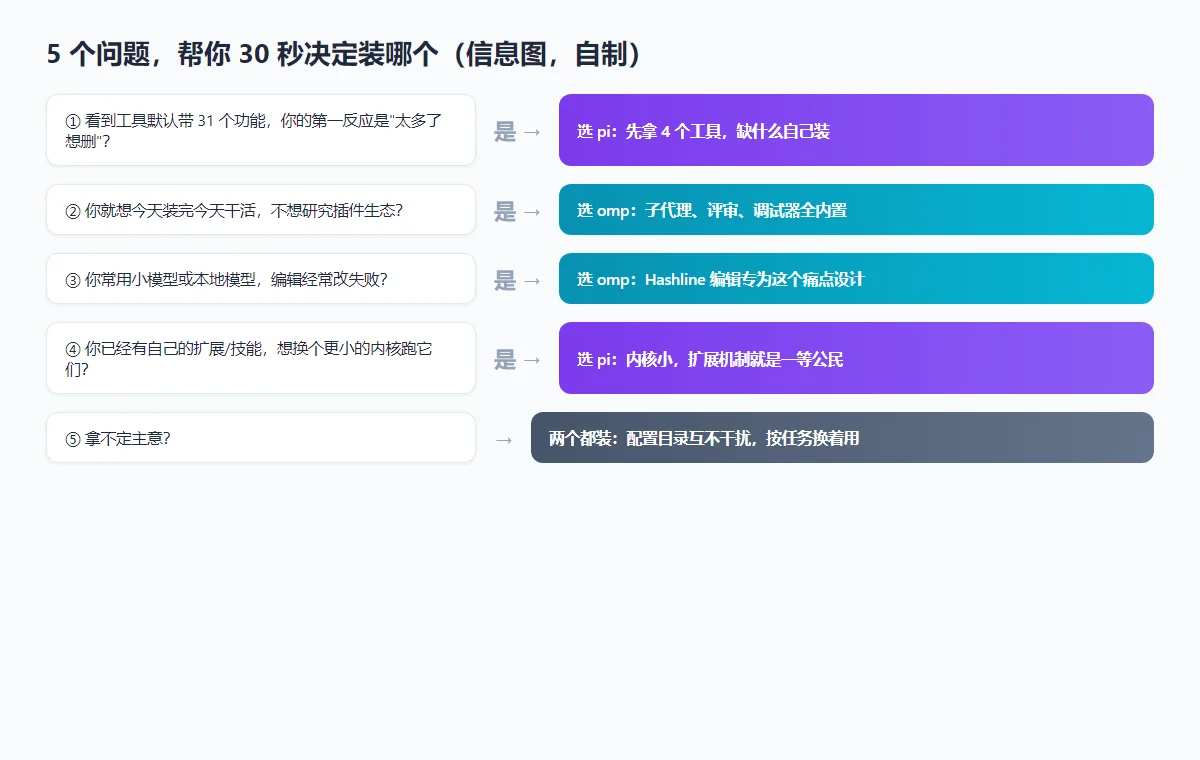
My suggestion: start with pi if you dislike tools making decisions for you; start with omp if you want to start working today without researching extensions. They do not conflict — install both and keep whichever feels better.
One-Click Install Scripts (Three Platforms)
Below are three scripts for Windows 11, Ubuntu 26.04, and macOS 26. They use only official sources and no third-party mirrors. Each does four steps: install runtime → install pi → install omp → verify version.
Windows 11 (PowerShell, run as Administrator)
#Requires -RunAsAdministrator
Set-StrictMode -Version Latest
$ErrorActionPreference = "Stop"

# 1. Install Node.js and Git (winget ships with Windows 11)
winget install -e --id OpenJS.NodeJS.LTS --accept-source-agreements --accept-package-agreements
winget install -e --id Git.Git --accept-source-agreements --accept-package-agreements

# 2. Install pi (npm comes with Node.js)
npm install -g --ignore-scripts @earendil-works/pi-coding-agent

# 3. Install omp (official PowerShell script)
irm https://omp.sh/install.ps1 | iex

# 4. Verify
pi --version
omp --version
Write-Host "Done. Run 'pi' or 'omp' and then /login to configure a model."
Ubuntu 26.04 (Bash)
#!/usr/bin/env bash
set -euo pipefail

# 1. Install Node.js 22 (NodeSource official repo) and base tools
sudo apt-get update
sudo apt-get install -y curl ca-certificates gnupg
curl -fsSL https://deb.nodesource.com/setup_22.x | sudo -E bash -
sudo apt-get install -y nodejs

# 2. Install pi
sudo npm install -g --ignore-scripts @earendil-works/pi-coding-agent

# 3. Install bun and omp
curl -fsSL https://bun.sh/install | bash
export BUN_INSTALL="$HOME/.bun"
export PATH="$BUN_INSTALL/bin:$PATH"
grep -q 'BUN_INSTALL' ~/.bashrc || echo 'export BUN_INSTALL="$HOME/.bun"; export PATH="$BUN_INSTALL/bin:$PATH"' >> ~/.bashrc
bun install -g @oh-my-pi/pi-coding-agent

# 4. Verify
pi --version
omp --version
echo "Done. Run pi or omp and then /login to configure a model."
macOS 26 (zsh, Homebrew-based)
#!/usr/bin/env bash
set -euo pipefail

# 0. Install Homebrew if missing (official script)
if ! command -v brew >/dev/null 2>&1; then
  /bin/bash -c "$(curl -fsSL https://raw.githubusercontent.com/Homebrew/install/HEAD/install.sh)"
fi

# 1. Install Node.js
brew install node

# 2. Install pi
npm install -g --ignore-scripts @earendil-works/pi-coding-agent

# 3. Install omp (official brew tap)
brew install can1357/tap/omp

# 4. Verify
pi --version
omp --version
echo "Done. Run pi or omp and then /login to configure a model."
Manual execution vs Agent-assisted setup
The scripts above are for manual execution: you copy, paste, and handle errors yourself.
Alternatively, send the prompt below to any AI assistant (pi, omp, Claude Code, Codex) and let it do the work:
Please install pi (npm package @earendil-works/pi-coding-agent) and
oh-my-pi (official docs at omp.sh) on the current machine. Requirements:
1. Detect OS and existing runtimes (node/npm/bun/brew/winget), install missing ones;
2. Use only official sources, no third-party mirrors;
3. Verify version after each step, stop and report on failure;
4. After installation print pi --version and omp --version;
5. Do NOT configure any API keys for me — just tell me the next command to run.
The upside of Agent-assisted setup is that it can adapt to your environment (nvm installed, PATH quirks, etc.). The downside is you should watch it so it does not change unrelated settings.
Security note: default config is not secure config
This point deserves its own section. pi has no built-in permission system. When the model gets the bash tool, it can run anything your shell user can run. Project-level .pi/extensions/ are executed automatically after you trust them.
Think of it like giving your house key directly to a cleaning person — they are probably trustworthy, but you cannot see what happens behind closed doors. The official README recommends using Docker containers or VMs for isolation, especially on projects you do not fully trust. The same advice applies to omp: more built-in power means more things that can touch your system.
Q&A
Q1: Can pi and omp be installed on the same machine?
Yes. Config directories are ~/.pi/agent and ~/.omp/agent, and command names differ.
Q2: I do not have a key for foreign providers. Can I still use them? Yes. pi supports 30+ providers and omp supports 60+, including domestic ones like Kimi and DeepSeek. Both also support local llama.cpp, which costs nothing.
Q3: Does the old npm install -g @mariozechner/pi-coding-agent still work?
It currently works as an alias, but the project has moved to earendil-works/pi. Prefer @earendil-works/pi-coding-agent.
Q4: With 31 built-in tools, is omp bloated and slow? omp rewrites core operations (search, file discovery, etc.) in Rust and bundles them natively. The official claim is “more features, each fast.” Try it for a couple of days and judge for yourself.
Q5: I am migrating from Claude Code. Do I have to rewrite my config?
omp auto-reads rules from .claude, .cursor, and .codex directories. pi reads AGENTS.md and CLAUDE.md as project context. Most rule-style configs transfer with little effort; tool-specific commands need adaptation.
Final thoughts
pi and oh-my-pi are two answers to the same question: how much should an AI coding tool ship by default? pi says as little as possible; omp says as much as possible. Neither is universally right — only right for your hands.
My personal workflow: pi for exploratory tasks (small, fast, predictable), omp for parallel sub-agents and code reviews. Both are MIT-licensed and actively updated. The cost of trying either is five minutes — far cheaper than reading ten comparison articles.
References: pi official docs, pi author’s design rationale, oh-my-pi GitHub, oh-my-pi website. Features and numbers reflect the official README as of late August 2026; always verify with pi --help / omp --help on your local install.