Enable Intel GVT-g Graphics Virtualization on Proxmox VE
Note: Intel GVT-g is currently only supported by fifth, sixth, and seventh generation Intel Core processors and Xeon E3 v4/v5/v6 processors on PVE. My tests show that 8th generation and newer CPUs are not supported for now -_-! If this changes, feel free to contact me. Reference: https://pve.proxmox.com/wiki/PCI(e)_Passthrough
I finally got an experiment machine. The test environment is:
PVE: 6.2
CPU: g5400
Motherboard: Maxsun H110
Step 1: Enable virtualization in the motherboard BIOS.
Step 2: Enable passthrough on PVE
- Enable IOMMU and GVT-g support
# Enable IOMMU and GVT kernel support
# Edit grub
vi /etc/default/grub
Find:
GRUB_CMDLINE_LINUX_DEFAULT="quiet"
Then change it to:
GRUB_CMDLINE_LINUX_DEFAULT="quiet intel_iommu=on i915.enable_gvt=1"

# Update grub
update-grub
- Load passthrough kernel modules
echo vfio >> /etc/modules
echo vfio_iommu_type1 >> /etc/modules
echo vfio_pci >> /etc/modules
echo vfio_virqfd >> /etc/modules
echo kvmgt >> /etc/modules
- Blacklist drivers
echo "blacklist radeon" >> /etc/modprobe.d/blacklist.conf
echo "blacklist nouveau" >> /etc/modprobe.d/blacklist.conf
echo "blacklist nvidia" >> /etc/modprobe.d/blacklist.conf
echo "blacklist nvidiafb" >> /etc/modprobe.d/blacklist.conf
echo "blacklist amdgpu" >> /etc/modprobe.d/blacklist.conf
echo "blacklist snd_hda_intel" >> /etc/modprobe.d/blacklist.conf
echo "blacklist snd_hda_codec_hdmi" >> /etc/modprobe.d/blacklist.conf
echo "blacklist i915" >> /etc/modprobe.d/blacklist.conf
- Add the graphics card to passthrough
- Use
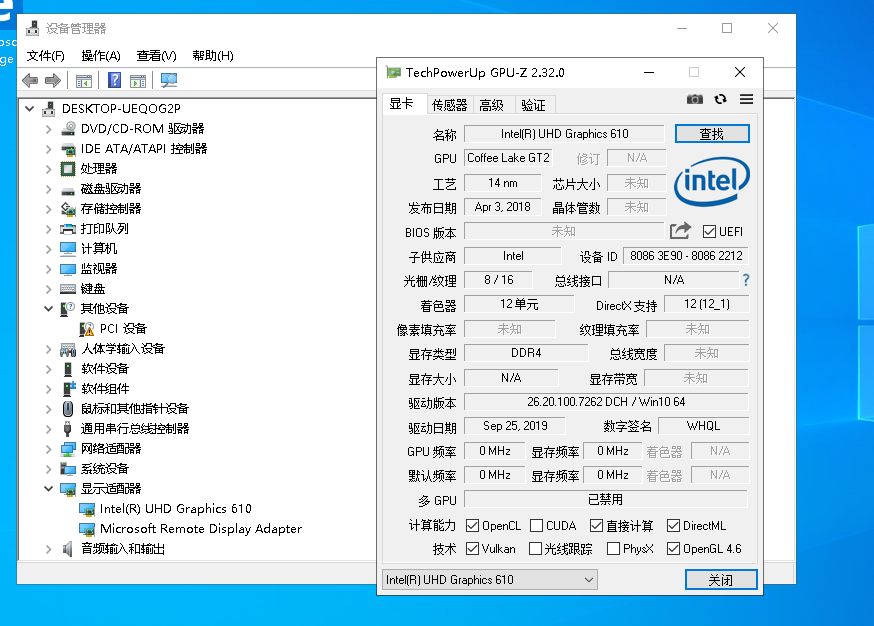
lspcito check the integrated graphics device ID, usually00:02.0. Here00:02.0is used as an example
# Check passthrough device
root@pve2:~# lspci -n -s 00:02.0
00:02.0 0380: 8086:3e90
# Add device 8086:3e90 to the passthrough group
echo "options vfio-pci ids=8086:3e90" > /etc/modprobe.d/vfio.conf
Step 3: Reboot the host
Step 4: Verify GVT is enabled
ls /sys/bus/pci/devices/0000:00:02.0/mdev_supported_types/ # Replace 00:02 with your own device ID.
If the following four options or similar appear, it worked.
i915-GVTg_V5_1 i915-GVTg_V5_2 i915-GVTg_V5_4 i915-GVTg_V5_8
Step 5: Create a virtual machine
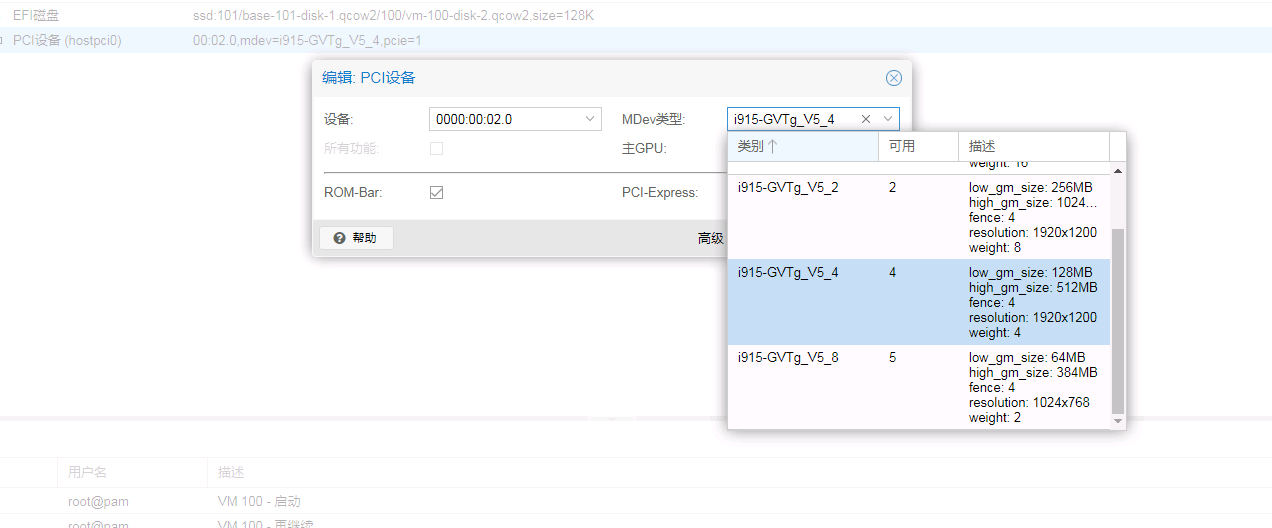
Create a new OVMF EFI virtual machine, set the CPU type to HOST, and set the motherboard to q35. After installing the system and enabling Remote Desktop, shut it down, set the VM graphics device to none, and add the PCIE device.
Summary
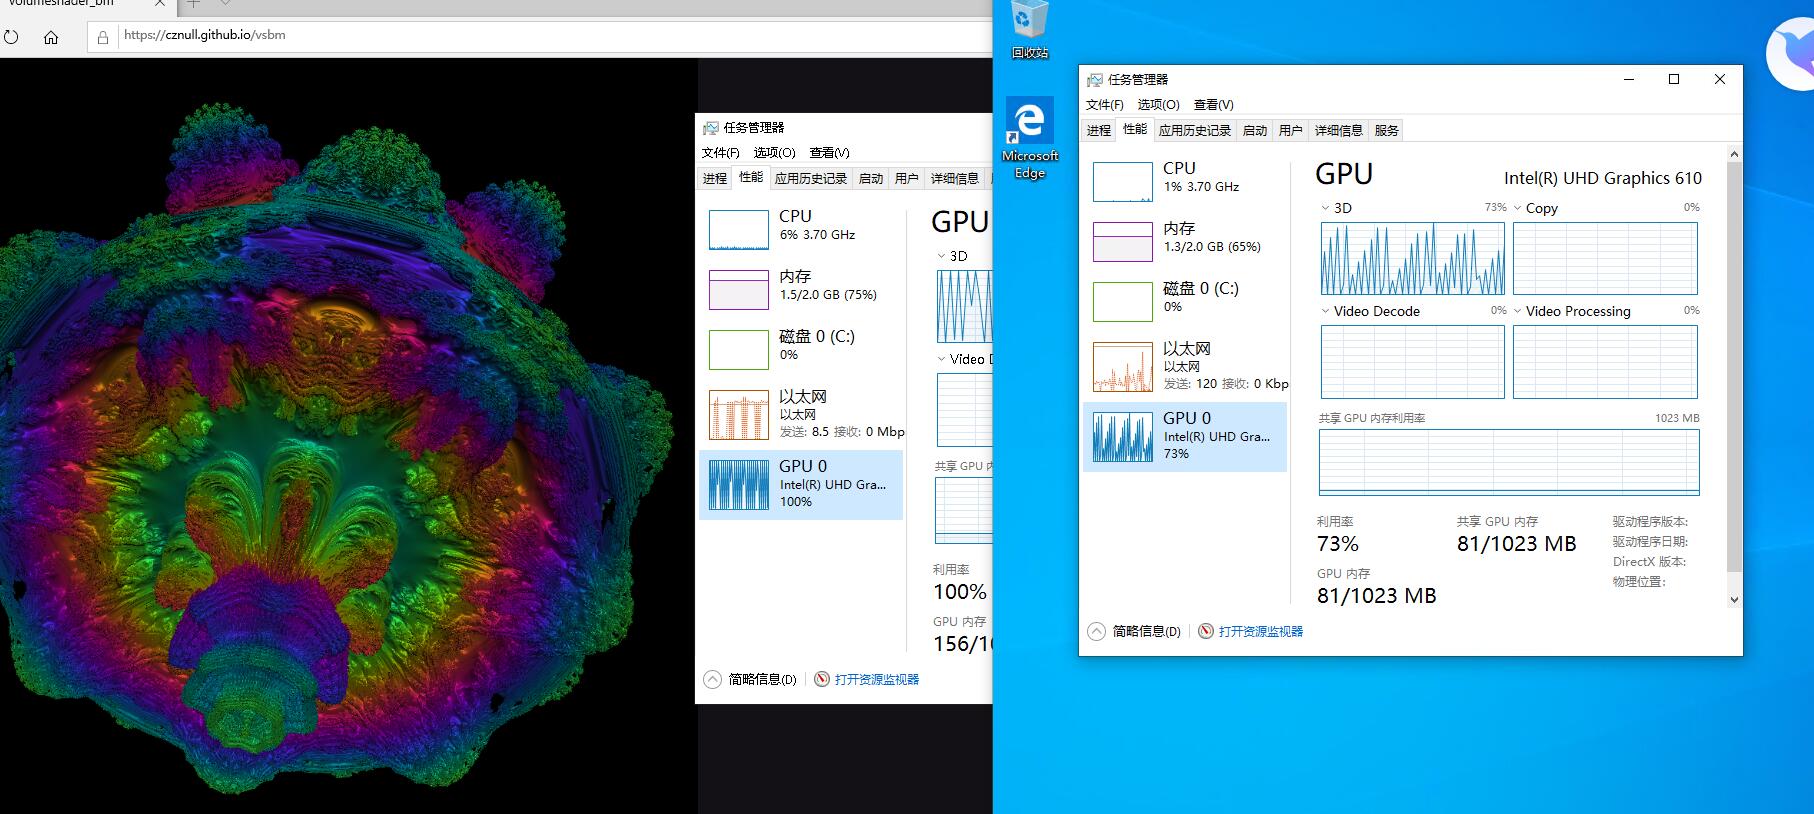
Setup is simple, but the performance is a bit weak. The GVT-G technology does not split the GPU into isolated modules like s7150/nvidia k1; instead, it shares GPU performance.
I ran two VMs, and when one of them was doing a 3D test, the other VM’s GPU usage was also fully loaded.