[Transfer] Installing and Configuring an ImmortalWrt Bypass Router
This article is a full English translation of Egg Targaryen’s “ImmortalWrt旁路由安装与配置”. The original article is published under the
CC BY-NC-SA 4.0license. The operation order and screenshots are preserved, with minor formatting adjustments for this site.
1. Downloading the ImmortalWrt firmware
ImmortalWrt provides an official firmware selector that can customize firmware packages: ImmortalWrt Firmware Selector.

Enter your device name, such as Nano Pi or x86, and choose the matching device from the drop-down list. Since I need to install it on a virtual machine manager running on an x86/64 platform, choosing Generic x86/64 is enough.
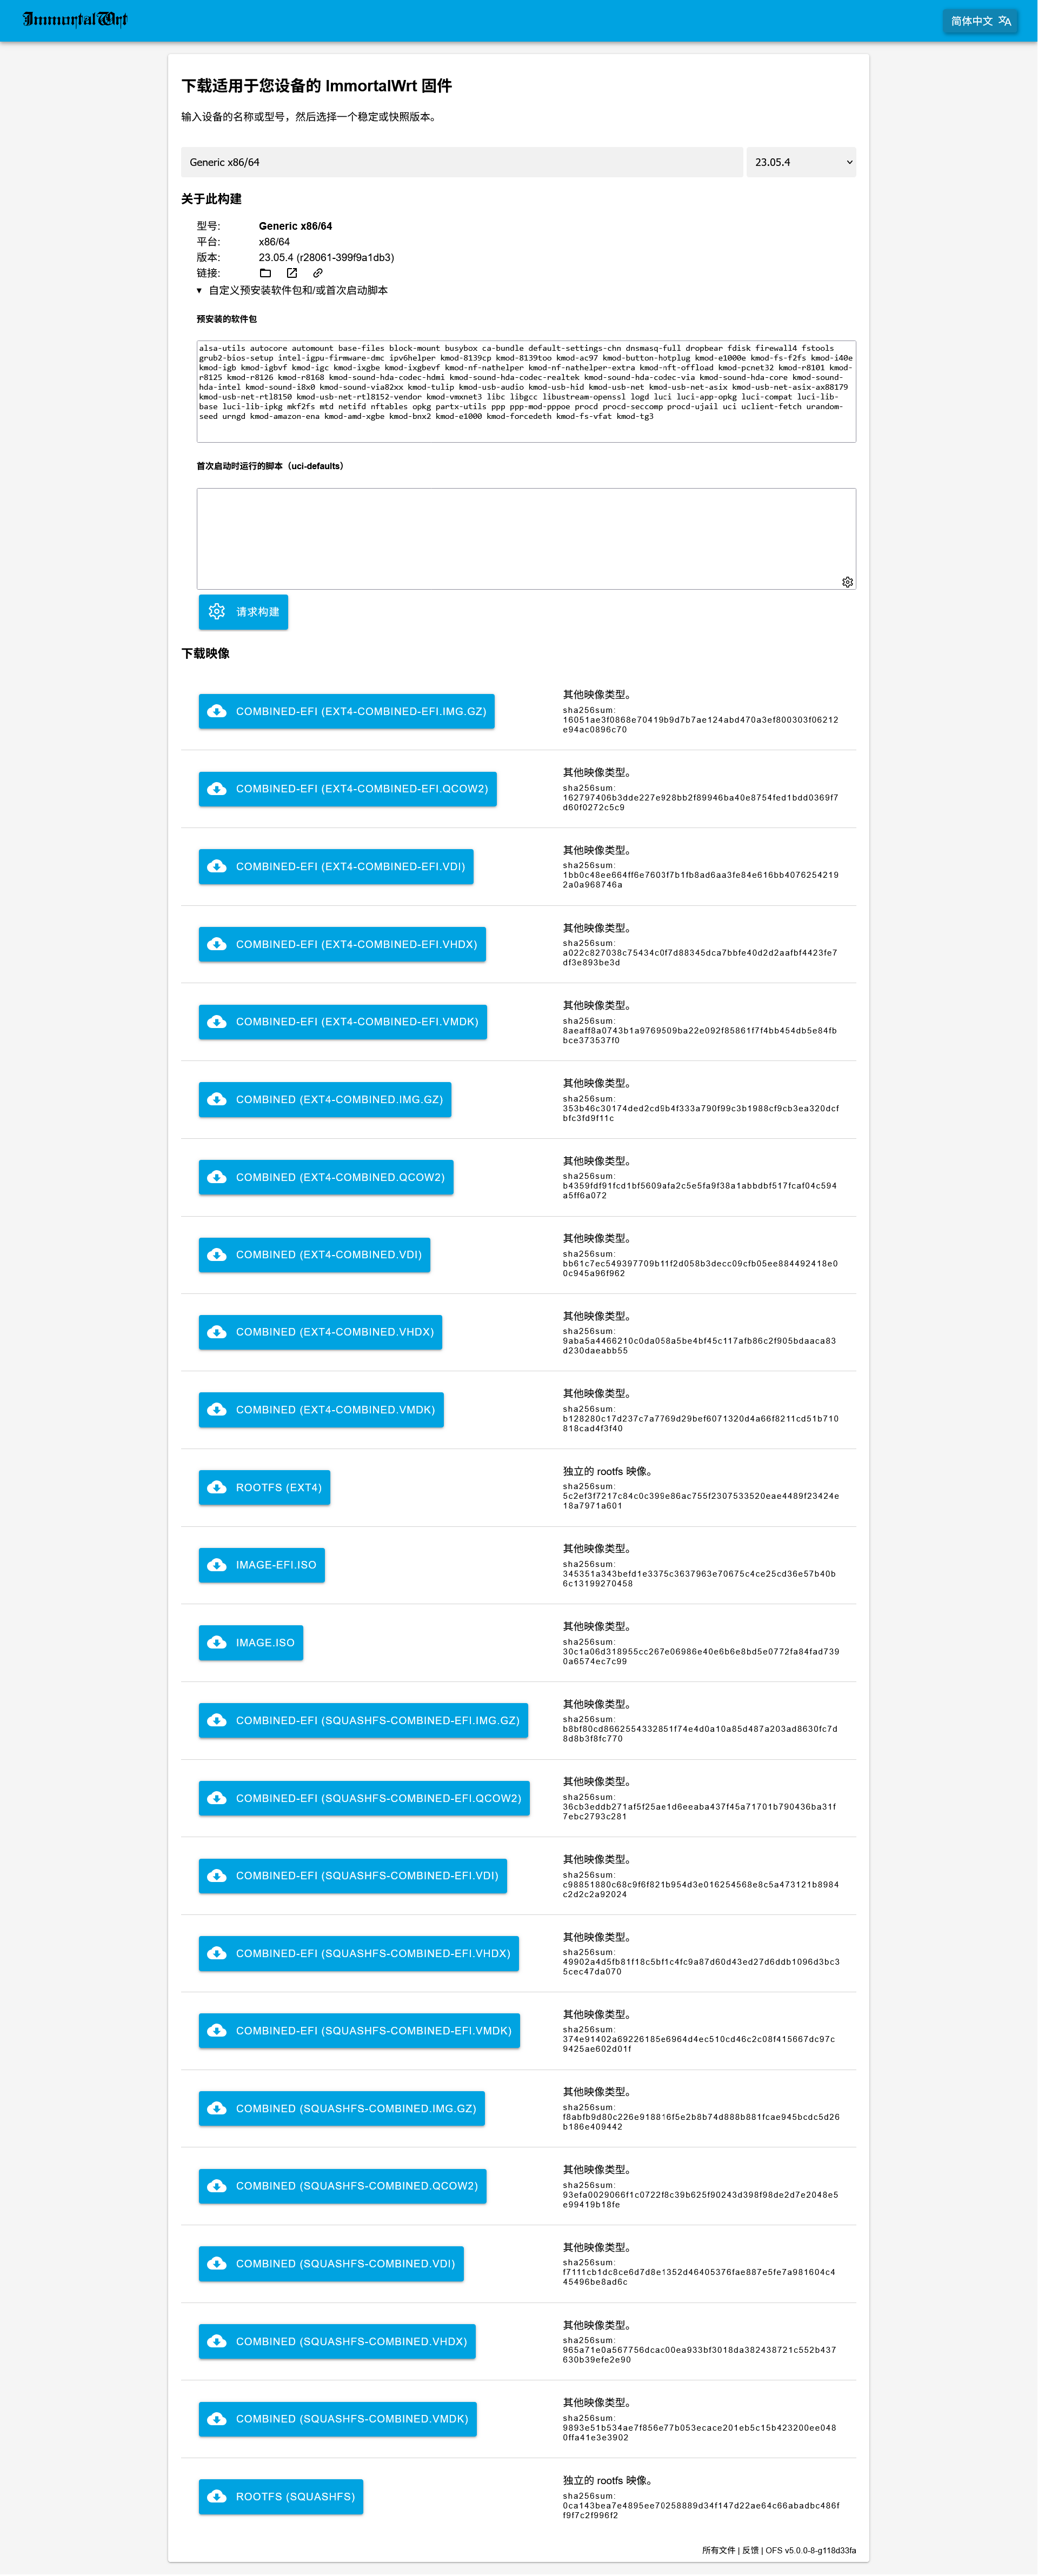
Because the virtual machine platform bundled with a certain well-known two-character NAS brand only accepts .iso images, do not use the custom image build option. A custom build will not provide an .iso file. I chose to download and use IMAGE.ISO directly.
2. Software configuration after installation
The process of installing the image in the virtual machine platform is very simple, so it is skipped here. Since my main router is also an OpenWrt device, the two routers have a static IP conflict. The bypass router’s IP address needs to be changed.
Use the VNC remote connection provided by the virtual machine platform to enter the bypass router terminal, then run the following three commands in order:
uci set network.lan.ipaddr=192.168.1.20  # Change the IP address according to your own needs
uci commit network
service network restart
Do not edit /etc/network/config directly. That file’s configuration will be overwritten by uci settings.
After the change is complete, enter the IP address in a browser to open the management backend. At this point the management interface is fairly basic, so you can install the luci-theme-argon theme to switch it to a more familiar management UI.
After refreshing the package list, install these packages:
luci-theme-argon
luci-app-argon-config
luci-app-ttyd
luci-i18n-ttyd-zh-cn
openssh-sftp-server  # ImmortalWrt does not include an sftp service by default
curl                 # ImmortalWrt does not include curl by default
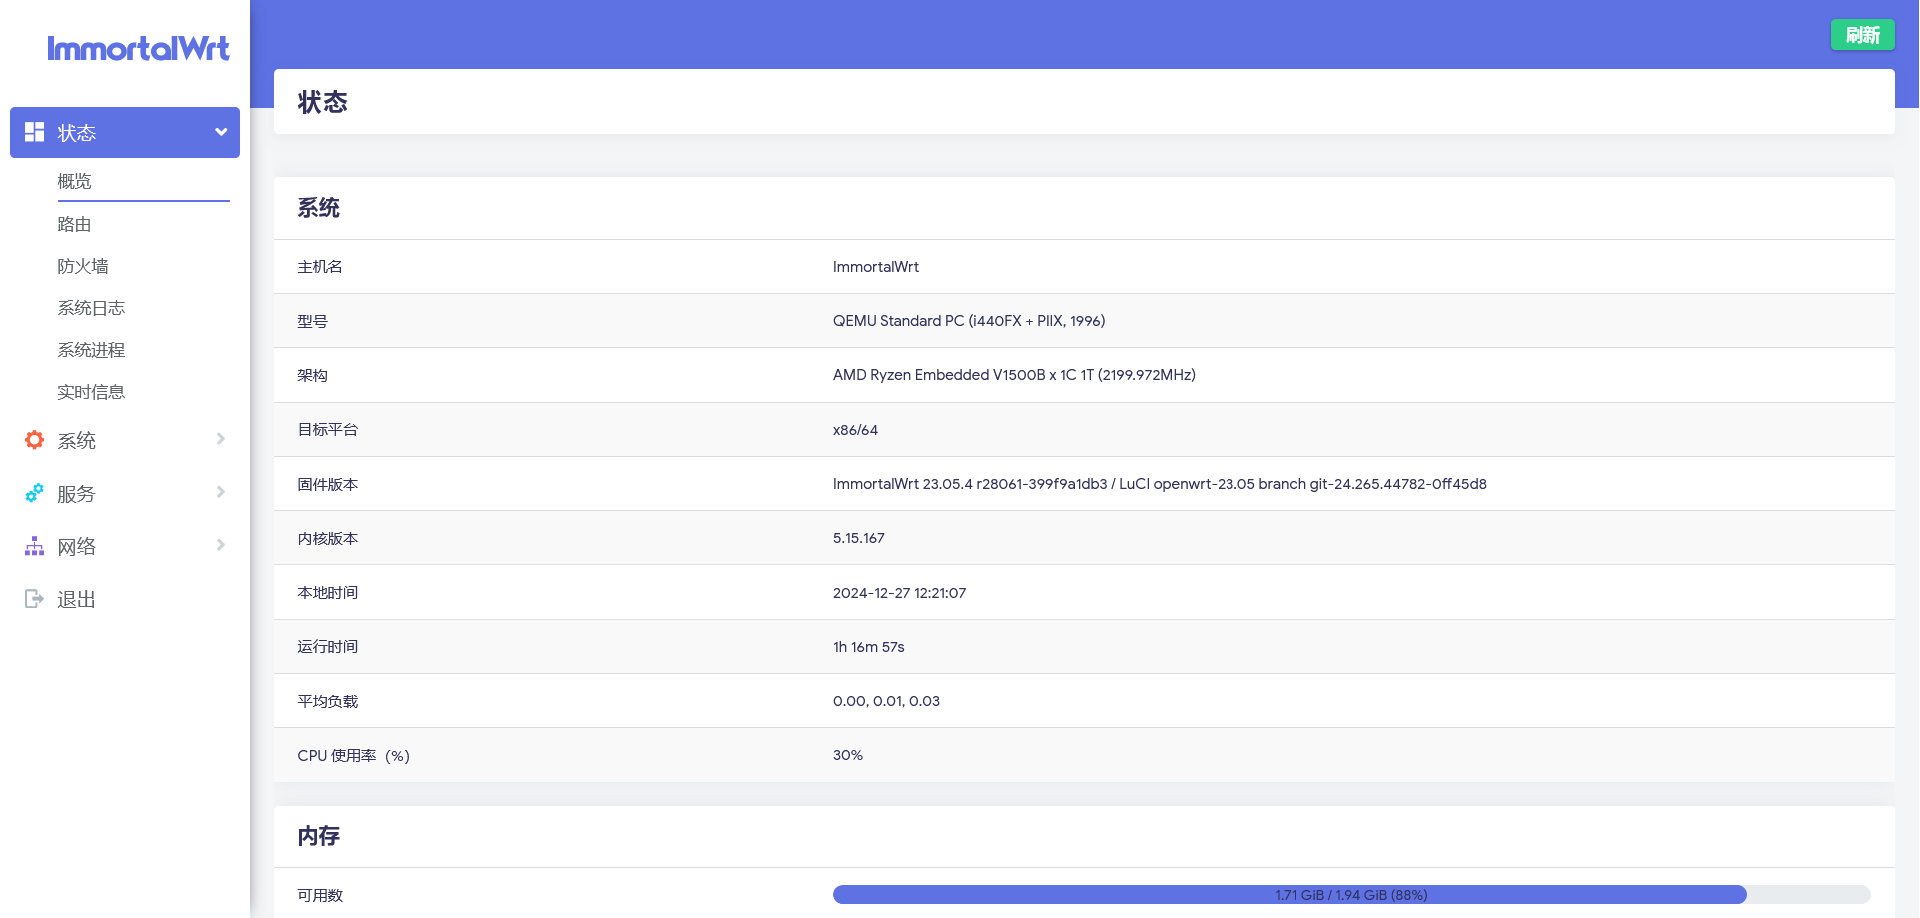
After installation, refresh the web page and you will see the familiar UI:
3. Bypass router settings
3.1 On the main router
Assign a fixed IP address to the bypass router on the main router side, for example 192.168.1.20 in my setup.
3.2 On the bypass router
Go to “Network” -> “Interfaces” -> “General Settings”, find the lan interface configuration, and change Device to eth0 (that is, the wan port). At the same time, set the IPv4 address to a fixed static address, for example 192.168.1.20, and point the IPv4 gateway to the main router, for example 192.168.1.1 in my setup.

Click “Advanced Settings” and change the DNS server to the main router, for example 192.168.1.1.

Click “DHCP Server”, then under “General Settings” check Ignore interface and save. This prevents the bypass router from taking over DHCP service from the main router and avoids disrupting the primary network topology.

After that, save the interface settings and click “Save & Apply”. At this point, devices that need to use the bypass router can change their gateway and DNS server to the bypass router, and they should work normally.
Source: “ImmortalWrt旁路由安装与配置”, by Egg Targaryen. The original article and images are published under the CC BY-NC-SA 4.0 license. This repost preserves attribution and adds an English translation.